
Learn how to make the perfect All Butter Pie Crust with this step-by-step guide. This crust is flaky, buttery and tender, perfect for sweet or savory pies. Complete with recipe tips, you’ll impress your guests with homemade pies that taste as good as they look!
Save This Recipe! 💌
I was in fourth grade when I taught my class how to make apple pie for a how-to book report presentation. I used a Pillsbury store-bought crust. I must have made that pie a hundred times during my childhood. Since then, I have learned all the tips and techniques in pastry school for baking the perfect homemade crust, and I’m excited to share them with you!
The best tasting pies begin with a flaky, all butter pie crust. Baking the perfect pie crust is a skill every baker should have (I promise it’s not difficult!). A flaky, butter crust can take a homemade pie (my favorite is blueberry apple pie) from average to irresistible. So preheat your oven, grab your rolling pin, and let’s get baking!
Butter Vs. Shortening Pie Crust
The question is always, should I use butter, shortening, or a combination of the two for the perfect crust? I believe an all butter pie crust is the way to go. Here’s why:
- Flakier: An all butter crust will produce a flakier crust. Butter has a higher water content than shortening, creating delicious flaky layers (you’ll even see the layers get puffier in the oven than with shortening).
- Better tasting: Shortening doesn’t even come close to tasting as good as butter. It can leave a waxy feel in your mouth, whereas butter is irresistibly delicious!
The 5 Ingredients You'll Need
To make this all butter pie crust, you only need 5 simple baking ingredients. I bet you already have everything you need in your kitchen.

- Flour: All-purpose flour gives the crust the perfect balance of tenderness and strength. I like using King Arthur flour (it’s not bleached and doesn’t use bromate).
- Granulated sugar: You only need a small amount of sugar. It’ll enhance the flavor and help give the crust a lovely golden brown color when baked.
- Salt: Adds a depth of flavor to the pie crust for a nice balance. I like using fine-grain sea salt or kosher salt (I avoid table salt since it’s highly refined).
- Unsalted butter: The key ingredient to creating flaky layers. Make sure to use COLD butter. I like to cube it ahead of time and keep it in the refrigerator until I’m ready to use it. If you use salted butter, reduce the salt to only ½ teaspoon.
- Water: Binds everything together. Use ICE COLD water to ensure the butter doesn’t melt into the crust.
Note: Using European butter, which has a higher-fat content, adds more flavor to your pie crust and will produce an even flakier pie crust. It’s not essential, but a nice alternative.
How To Prepare The Pie Crust (Step-By-Step)
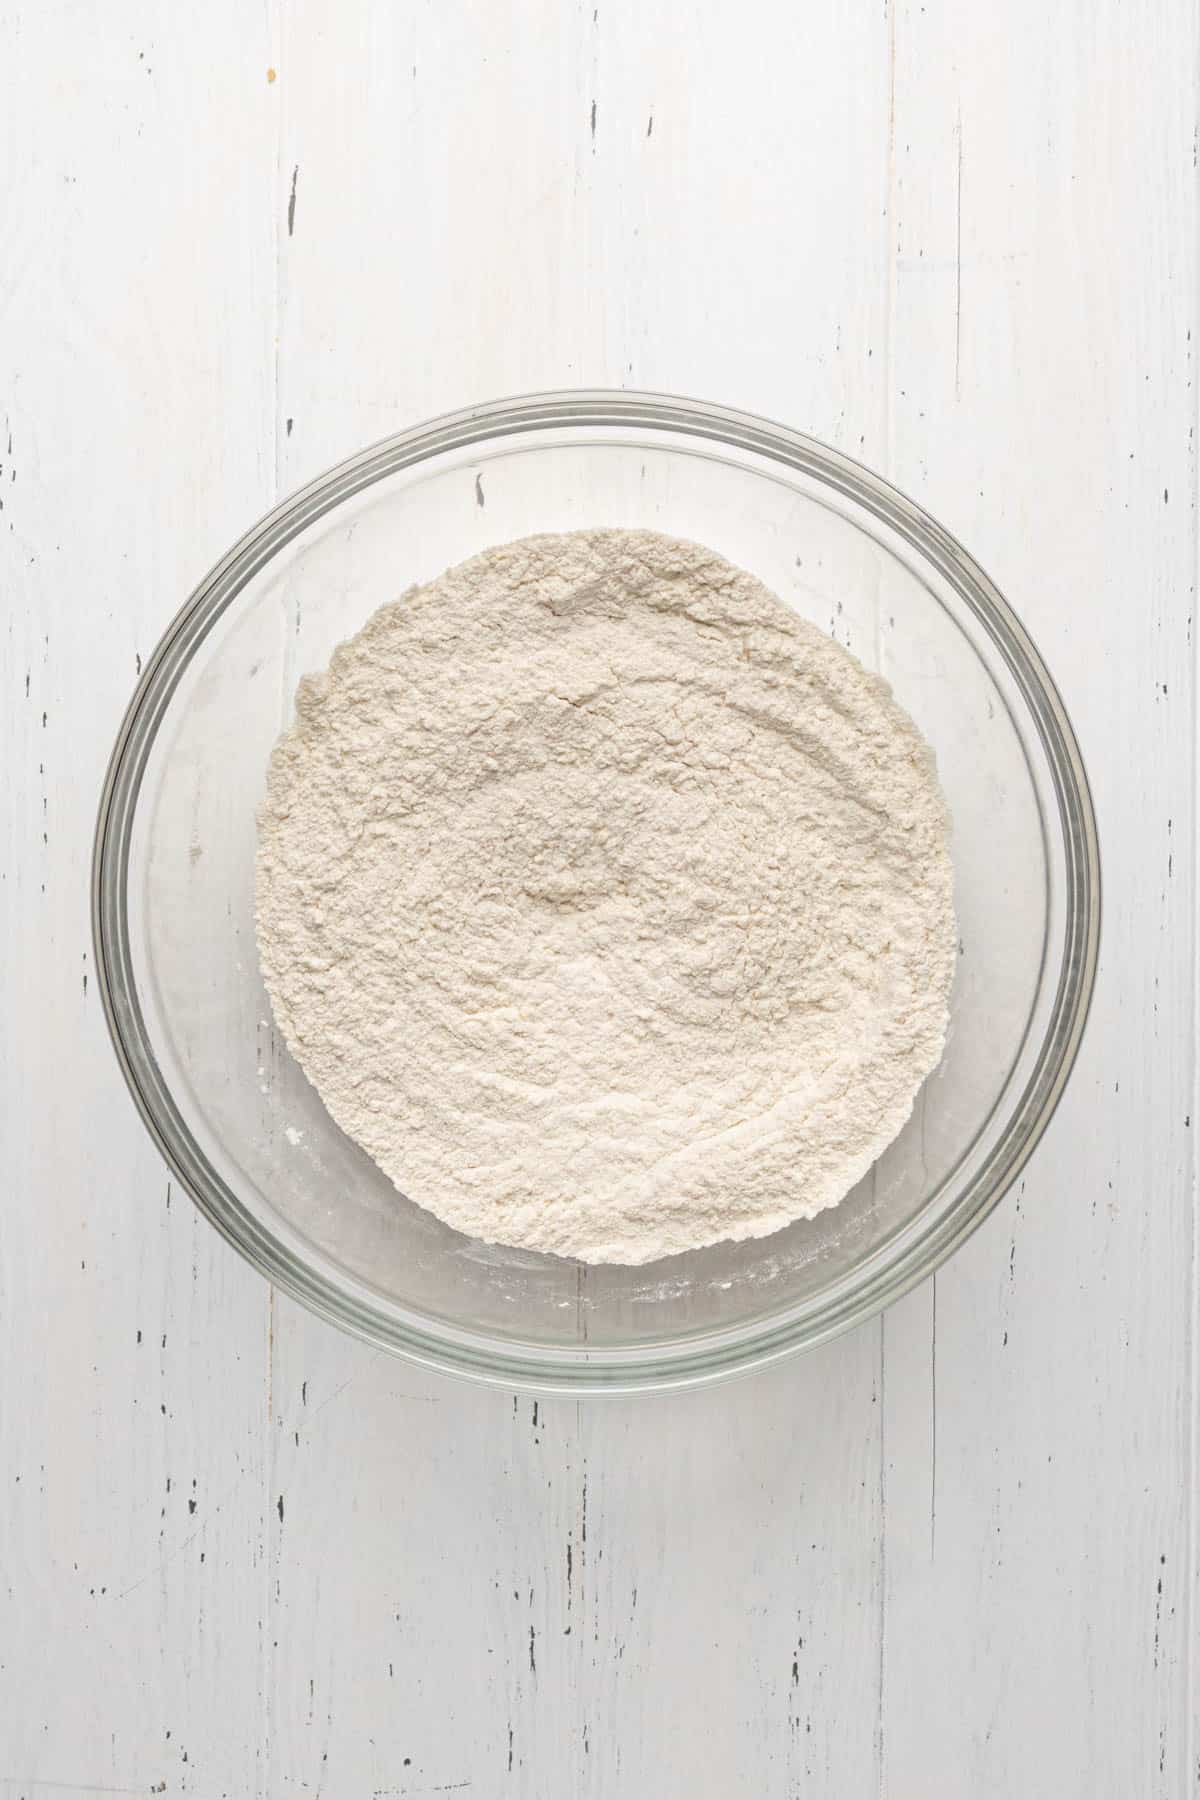
Combine dry ingredients: Whisk the flour, sugar, and salt in a large bowl.
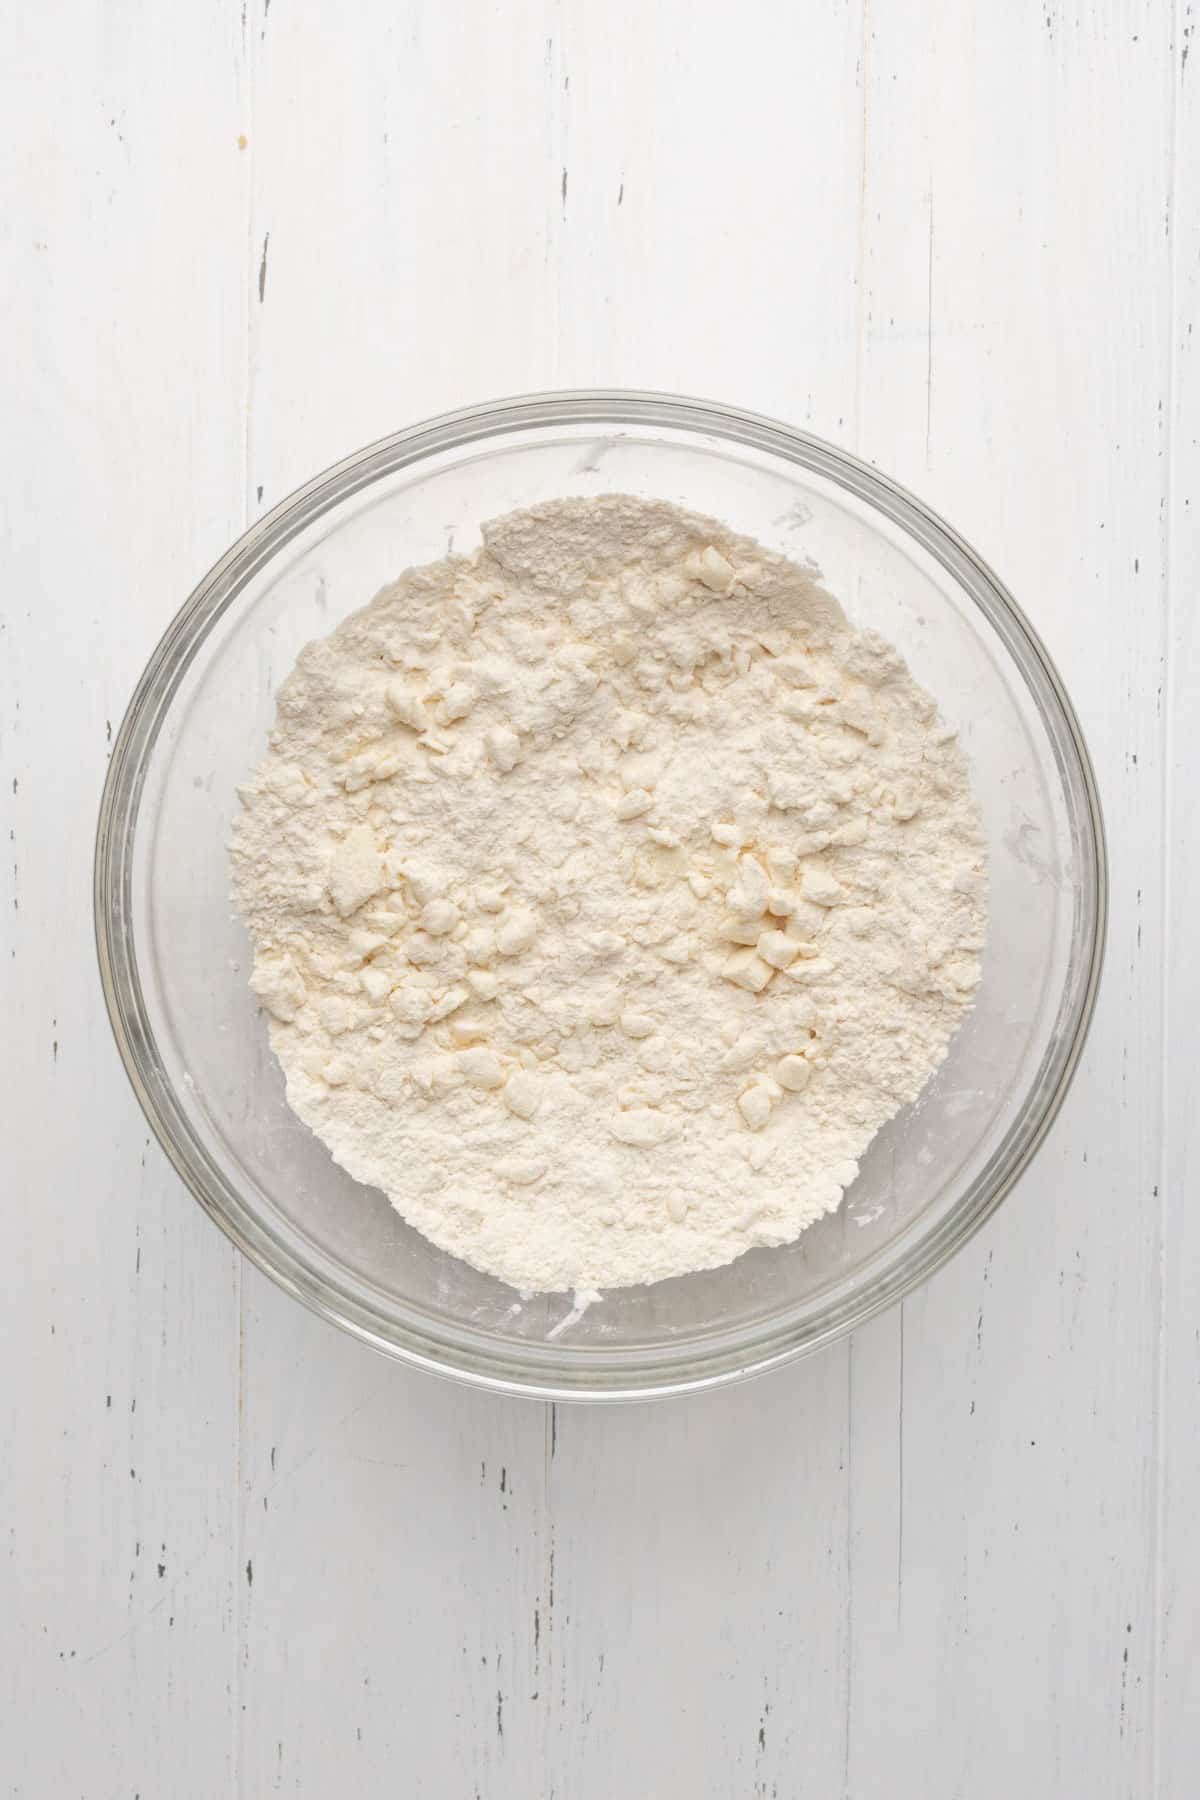
Work in the butter: Cut cold cubed butter into the dry ingredients working the mixture until the dough has pea-sized butter pieces.
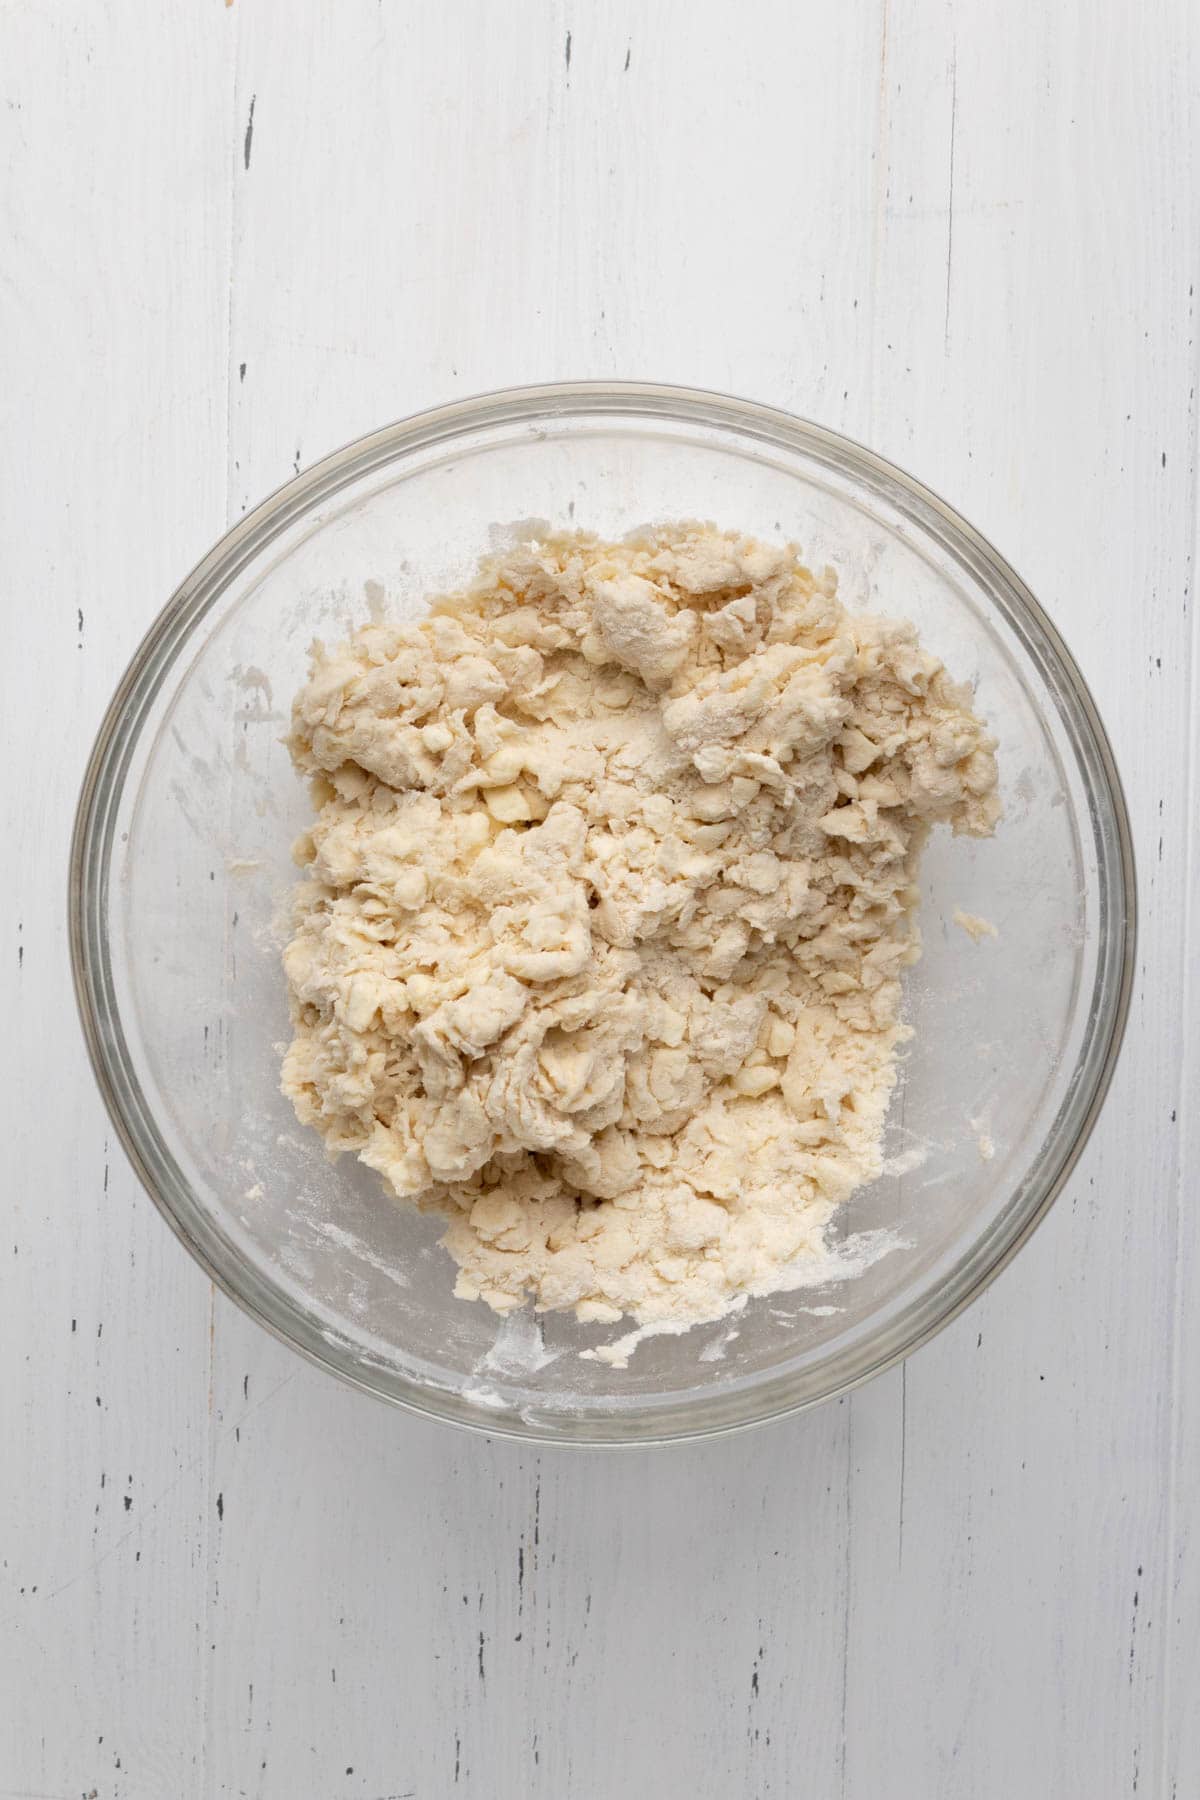
Bring everything together: Slowly add water, a couple of tablespoons at a time, and gently mix after each addition. Add enough water until the dough begins to come together. Gently squeezing together some of the dough should not feel sticky and it should hold its shape.
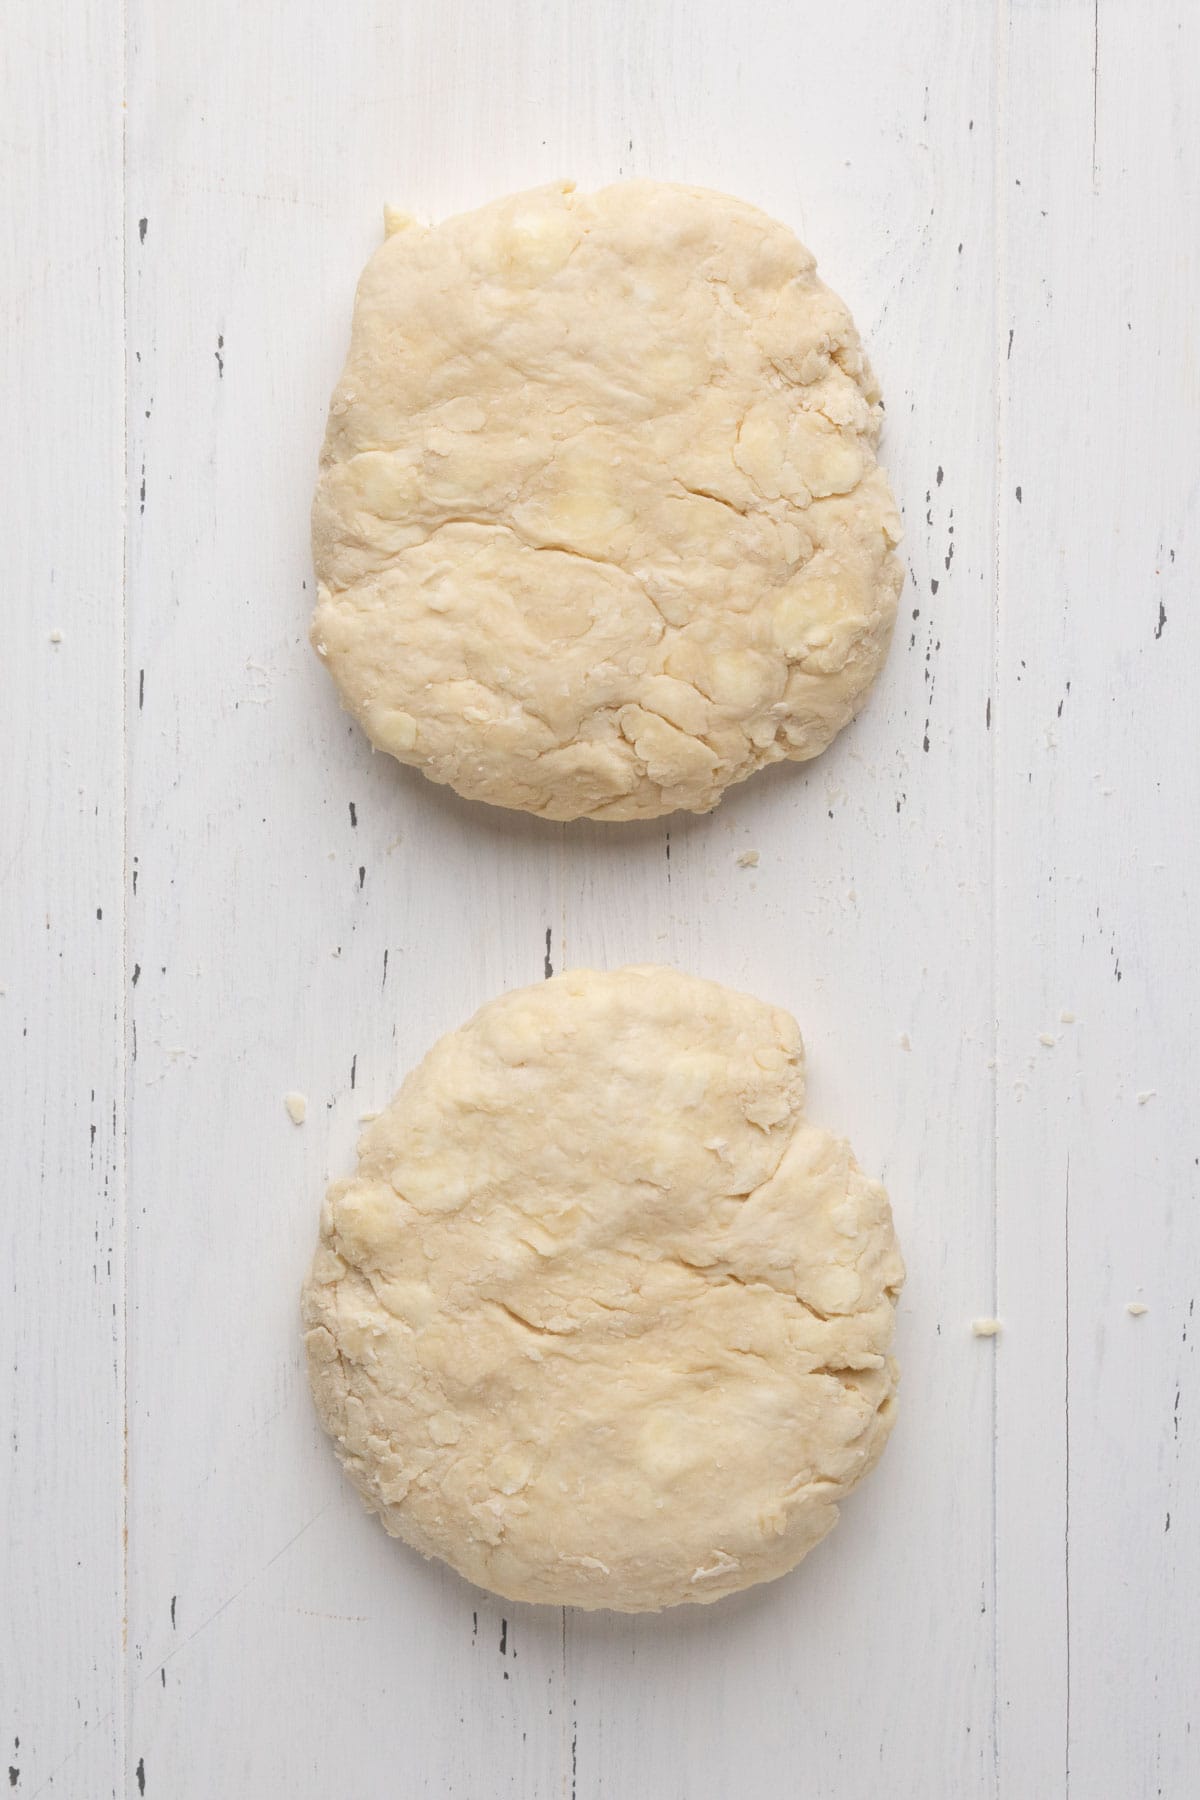
Chill the dough: Divide the dough in half, flatten it into two round discs, and tightly wrap each half in plastic wrap. Refrigerate for at least 2 hours.

Note: To prepare the dough ahead of time, refrigerate for up to 2 days before baking your pie.
How to Roll Pie Dough
You’ll want to start with a lightly floured surface to prevent the pie dough from sticking. Lightly is key, or else the dough will absorb the excess flour. Here’s how to roll the dough for pie:

- Roll the dough from the center outward.
- Turn the dough 90° and repeat while maintaining an even thickness.
- Continue to roll out the dough until it is about 3” larger than your pie dish.
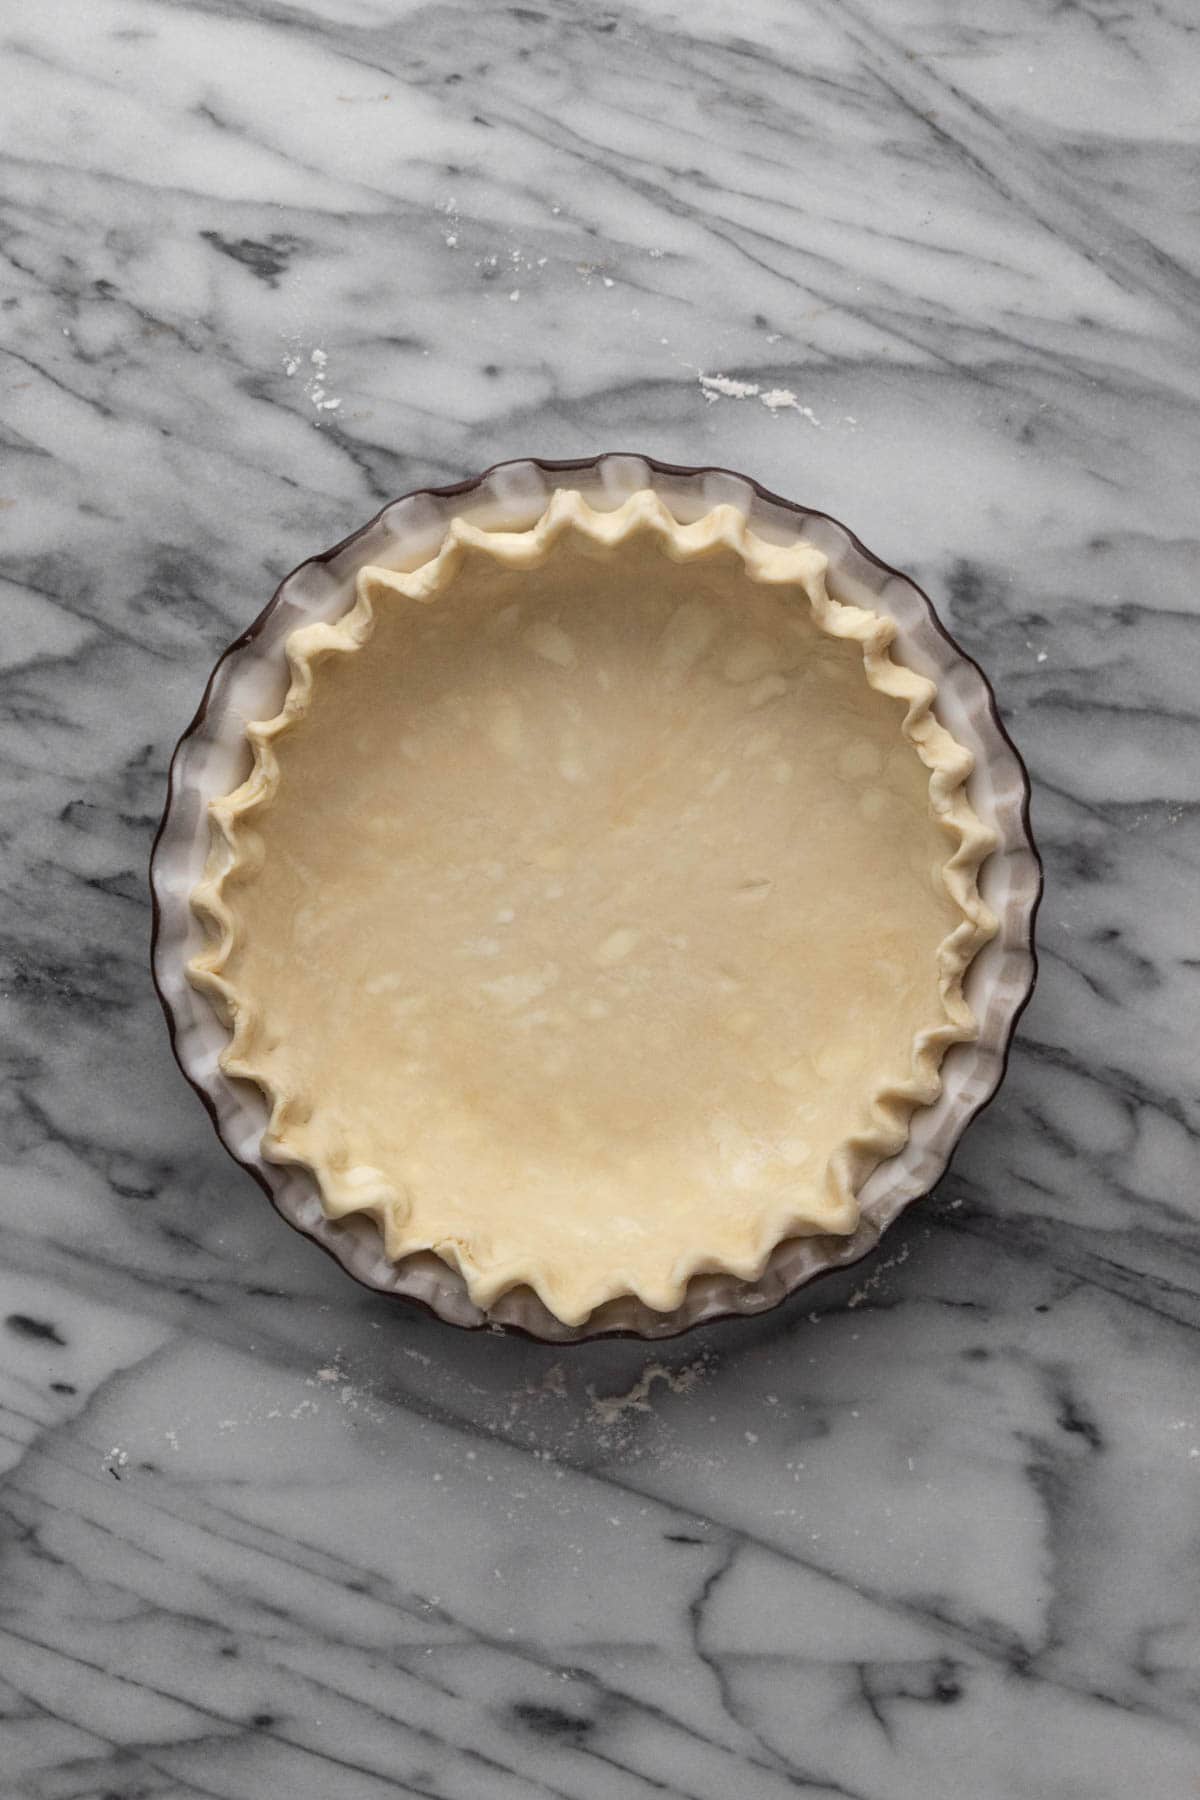
- Transfer the pie dough to a baking dish by folding it into quarters or rolling it onto a rolling pin.
Note: It’s important to work quickly with your pie dough. If it becomes too warm, cover it and refrigerate it for about 5-10 minutes before resuming to maintain a flaky crust.
Tips For Making The Perfect Pie Crust
- Use cold ingredients. I know I’ve said this before, but using cold butter and water for the perfect flaky crust is essential.
- Don’t overwork the dough. Once the water is added, only mix until the dough just comes together. Overworking the dough will result in a tough pie crust.
- Chill the dough. Storing the crust in the refrigerator for at least 2 hours before rolling it out will ensure you maintain the flaky layers. It also helps the gluten in the dough relax so when the crust bakes, it doesn’t shrink.
- Gently line your pie dish. Transfer the pie dough to the baking dish, allowing it to fall into place. You don’t want to force it into place otherwise, it could shrink during baking.
- Refrigerate the pie crust. Once you line your pie dish with the crust, refrigerate it while you prepare the filling to keep the crust cold.
- Bake your pie in a glass pie dish. Glass baking containers transfer heat evenly, so your crust will bake evenly (no soggy or undercooked bottom crust).

Pie Crust Troubleshooting
- Crumbly pie dough: If your dough doesn’t hold its shape when you gently squeeze it in your hand, you’ll want to add additional water, 1 tablespoon at a time, to make sure it comes together nicely without being sticky.
- Tough pie dough: We already discussed how overworking the dough can create a tough crust. Not enough fat in the dough can also create a tough crust. Make sure to use all the butter called for in the recipe.
- Pale pie crust: Brushing a simple egg wash over the top of your crust before baking will add the perfect shiny layer to your pie and give it a lovely golden brown color.
Egg wash: Whisk together one whole egg and 1 tablespoon of milk or water for a simple egg wash that’ll do the trick.
Recipe FAQ
It really depends on the filling recipe you are using. Follow the directions of your recipe. If you blind bake the crust, line the dough with parchment paper and then fill it with pie weights or dried beans to prevent the dough from puffing up and then shrinking.
Absolutely! You can bake the crust without the sugar. It’ll be a little less browned, but still delicious.
Yes! Wrap it tightly with plastic wrap and then aluminum foil. You can store it in the freezer for up to 3 months. Thaw in the refrigerator overnight when you’re ready to use it.
Pie That Pair Well With This Crust
I hope you love using this All Butter Pie Crust for all your pie baking, sweet and savory. Please leave a comment below, I love reading your feedback! And if you’d like to make this recipe later, don’t forget to pin it on Pinterest. Happy Baking!
Print
All Butter Pie Crust
- Total Time: 2 hours 15 minutes
- Yield: 2 pie crusts 1x
Description
Learn how to make the perfect All Butter Pie Crust with this step-by-step guide. This crust is flaky, buttery and tender, perfect for sweet or savory pies. Complete with recipe tips, you’ll impress your guests with homemade pies that taste as good as they look!
Ingredients
- 350 g (2 ½ cups) all-purpose flour
- 1 tablespoon granulated sugar
- 1 teaspoon salt
- 226 g (1 cup) very cold unsalted butter, cubed
- 120 g (½ cup) ice water, more as needed
Instructions
- In a large mixing bowl, whisk the flour, sugar and salt.
- Cut the cold cubed butter into the dry ingredients using a pastry cutter or by hand, rubbing the pieces of butter between your thumb, index, and middle fingers. Work the dough until your butter is pea-sized. Do not overwork the butter or allow it to get too warm.
- Slowly add the ice water to the dough, a couple of tablespoons at a time, and stir using a wooden spoon. Add enough water until the dough comes together. Gently squeeze together some of the dough. It should hold its shape and not feel sticky. Do not over-mix the dough.
- Divide the dough in half. Flatten each piece into a 1-inch round disc. Wrap each half in plastic wrap and refrigerate for at least 2 hours, or overnight.
- To roll the dough, allow one of the dough discs to sit at room temperature for 10 minutes. Lightly flour a work surface and begin to roll the dough from the center out. After each roll, rotate the dough 90°. Lightly sprinkle with flour as needed to prevent the dough from sticking. Roll the dough until it's ¼-inch thick.
- Continue with the pie according to your recipe's directions.
- Prep Time: 15 minutes
- Chill Time: 2 hours
- Category: Pies & Crisps
- Method: Baking


Lindsey says
This is the perfect pie crust recipe! It’s light, flakey, and sooo easy to make! I used it for two pumpkin pies on Thanksgiving this year and both pie crusts turned out amazing! I made it by hand because I didn’t want to wash anymore dishes lol, and it was actually so fun to squish the pieces of butter into the flour. I’ll definitely be making this again!
Maria Pagiotas says
Hi Lindsey! I'm so happy you enjoyed this pie crust recipe!! Haha I agree better to do by hand to reduce dish washing! Thank you for sharing!
Bev says
My mom use to make herdough this way but never had the recipe. Know will give it a try. Thank you!
Maria Pagiotas says
Hello! It's an easy way to make homemade dough with a delicious butter flavor 🙂 Pie is always a favorite! Happy baking!!