
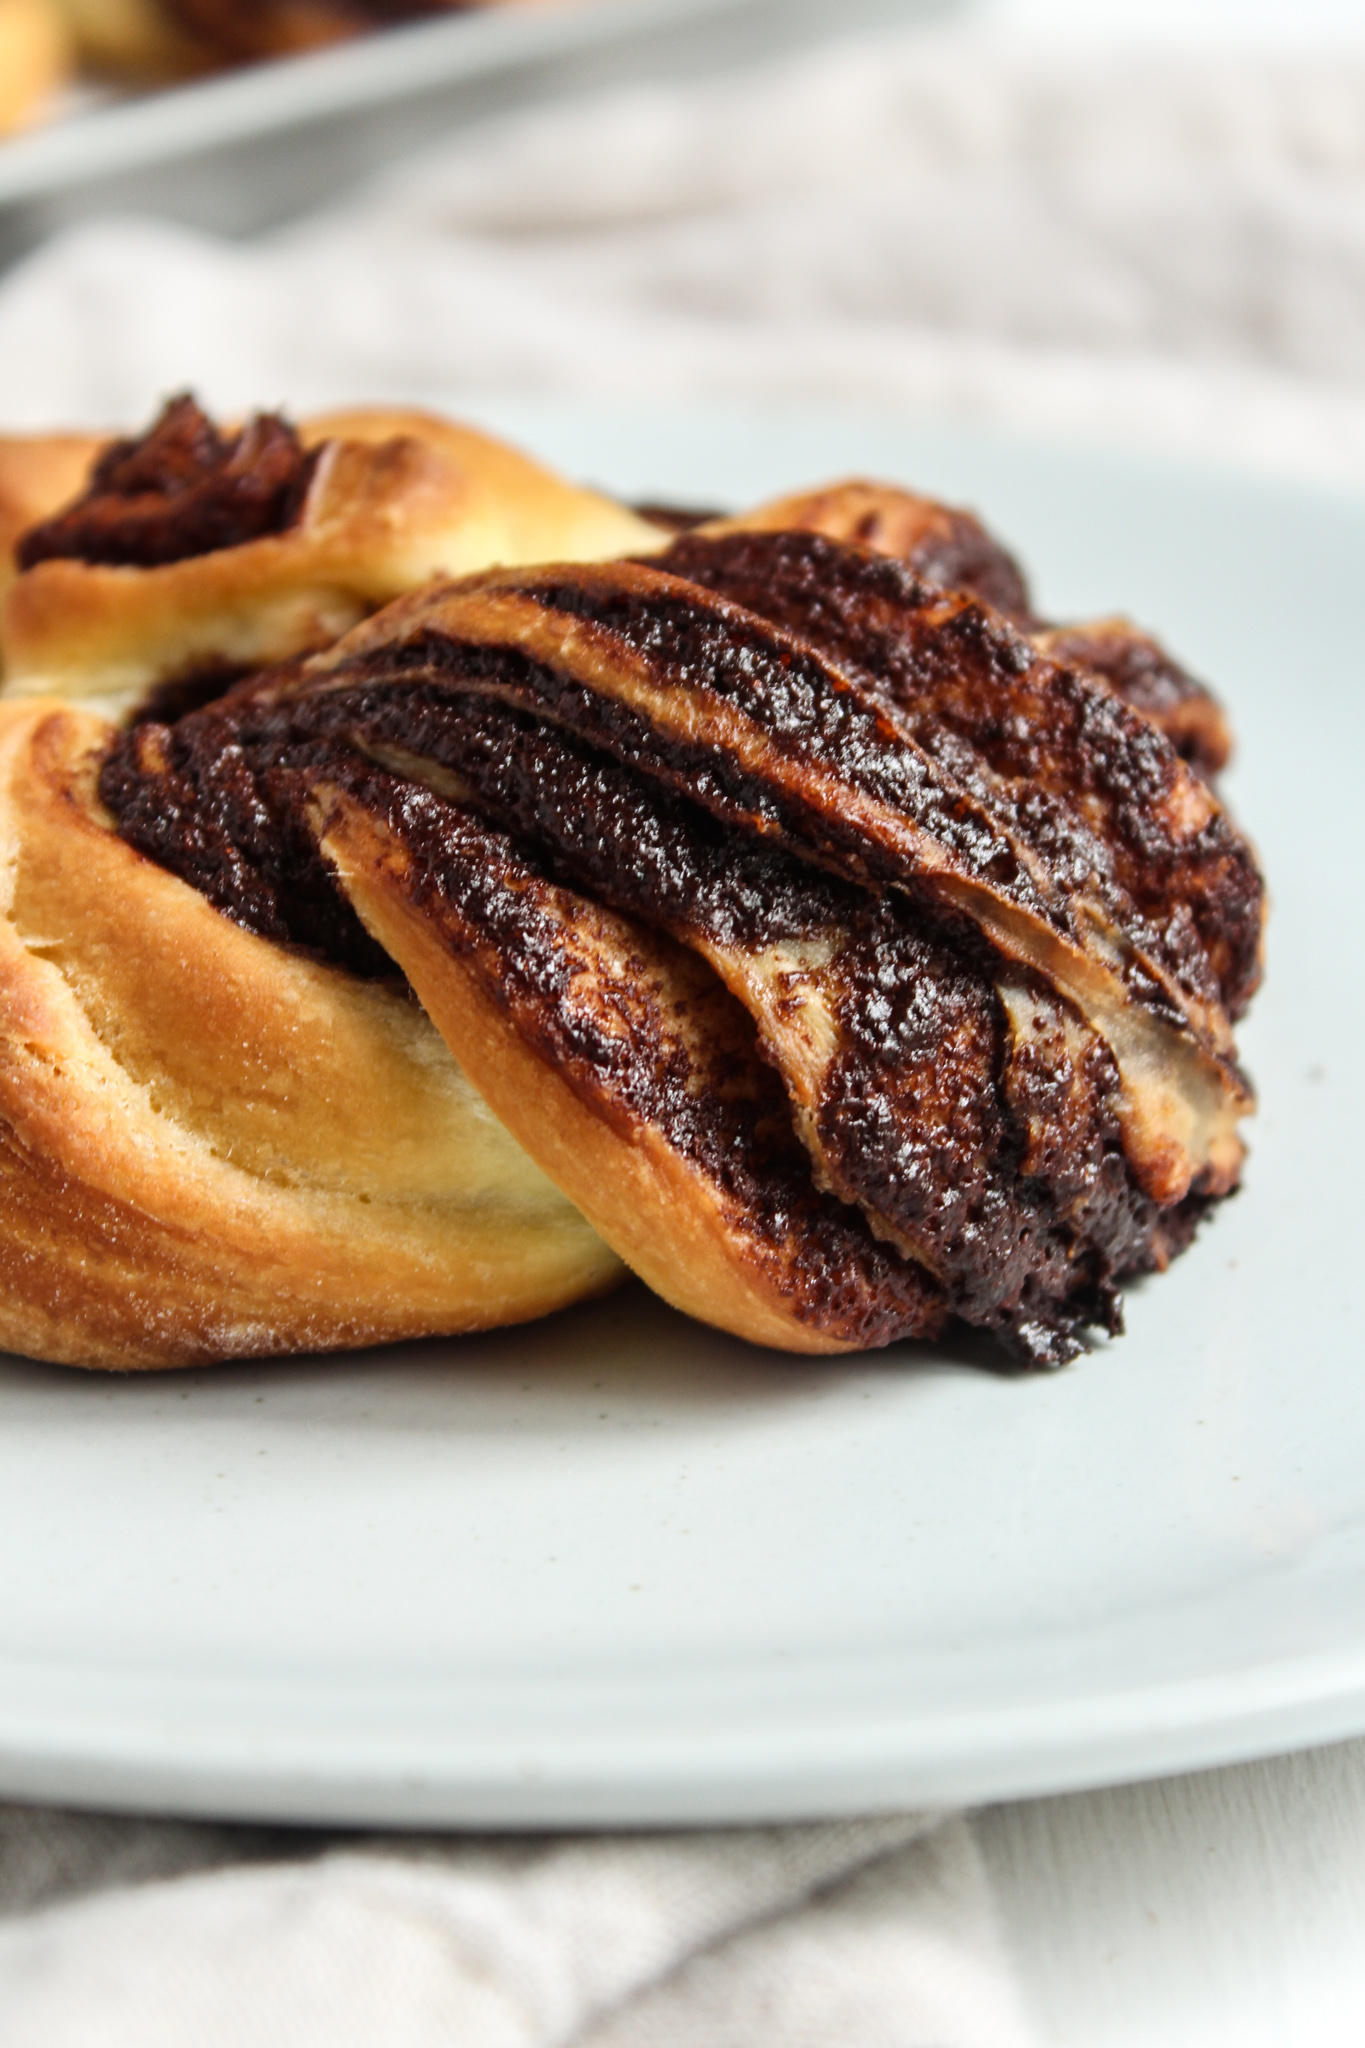
Chocolate brioche bread is an enriched yeasted bread that is layered with slightly sweetened chocolate filling. This delicious pastry can be served for breakfast or dessert.

Save This Recipe! 💌
Brioche is an enriched yeasted dough. In other words, compared to bread that's only made with flour, water, yeast, and salt (a lean dough), this enriched dough has additional ingredients consisting of sugar, eggs, milk, and butter. It produces a rich and buttery bread that is still soft and tender. To enhance this already delicious dough, I have added a layer of slightly sweetened chocolate and rolled the dough into individual pastries that can be served for breakfast or as dessert. It's a beautiful presentation that's especially nice to serve for the holidays.
Pastry can be intimidating and sometimes difficult to execute because of the many components that can go into just one dessert. Brioche, on the other hand, may look complicated to make especially chocolate brioche with all its layers, but in reality, it's not. When you use a mixer, the dough can easily be mixed and then refrigerated overnight. Once proofed, it is cut, rolled, filled, shaped, proofed, and baked. All simple steps to execute and the result is well worth it.
What you need to make Chocolate brioche
Baking supplies
Stand mixer bowl fitted with the dough hook
Silicone spatula
2 medium bowls
Bench scraper
Rolling pin
Offset spatula
Serrated knife
Pastry brush
Parchment paper
Baking sheet pan
Ingredients
All-purpose flour. For this particular recipe, all-purpose flour is used. You may think because it is a bread dough, you would use bread flour. However, since we are using the dough to make a pastry (and not just a bread), we do not want to sacrifice texture for structure. In other words, all-purpose flour has a lower protein content and will produce a more tender bread than bread flour, which is ideal for this pastry.
Instant yeast. Add yeast straight to the dough ingredients. Activating the yeast in warm water before adding to the dough is not required. You can find instant yeast at the grocery store also under the name of rapid-rise yeast.
Granulated sugar. Although sugar is added to the dough, brioche is not a very sweet bread. Instead, it adds only a bit of sweetness. The richness of the dough comes more from the eggs, butter, and milk.
Salt. A little salt helps to balance the sweet flavors in pastries. Just a little bit goes a long way.
Eggs. There are several reasons eggs are added to brioche dough. One is to add richness to the dough (as well as to the color of the dough, hence the more yellow color of the dough). Another reason eggs are added is to add moisture to the dough. Eggs contain water and, when added to the kneading process, help moisten the dough, which in turn helps develop the gluten. Lastly, the protein content of eggs contributes to the more dense texture of brioche bread compared to a lean dough.
Milk. Brioche dough uses milk instead of water. The proteins in milk help contribute to the browning process of the dough. In addition to the eggs and butter, milk is another ingredient that enhances the flavor of the bread (aka "enriched dough").
Butter. Butter is one of the ingredients that makes brioche an enriched dough. There are a couple of reasons for using butter in this bread. The main reason is to yield a richer flavor. Additionally, the fat in butter will surround the air bubbles in the bread and stabilize them, resulting in a bread that has a crumb made of many tiny air bubbles once it's baked. For this recipe, and in baking in general, always use unsalted butter.
Cocoa powder. This adds the chocolate flavor to the filling. Either unsweetened natural cocoa powder or dutch process cocoa powder can be used.
Honey. This will add some of the sweetness to the filling. Additionally, the consistency of the honey will contribute to making the filling spreadable.
How to make chocolate brioche
- Mix the dough. In a stand mixer fitted with the dough hook, combine all the dry ingredients. Add the eggs and milk, and mix on medium speed for about 5 minutes. Scrape the sides and bottom of the bowl, and check the consistency of the dough. If it is still super sticky, add 1 tablespoon of flour, and mix for another 5 minutes. Continue this process two more times so that the dough mixes for a total of 20 minutes (including the initial 5 minutes). Only add enough flour until the dough becomes smooth and elastic. It will still be slightly sticky to touch, which is normal.
- Add half of the butter while the mixer is on low. Once it is incorporated (about 3-4 minutes), add the remaining butter, and mix on medium speed for about 5 minutes or until the butter is fully incorporated, and the dough is elastic and shiny. Place dough in a lightly floured mixing bowl, and cover with plastic wrap. Allow to proof at room temperature for 1-2 hours or until dough doubles in size.
- Stretch and fold the dough, and refrigerate overnight.
- Make the chocolate filling. In a mixing bowl, beat butter until light and creamy. Beat in the sugar until light and fluffy and then add remaining filling ingredients and mix well.
- Roll the dough. Remove the dough from the refrigerator, and divide it into four equal parts. Working with one piece at a time, roll each piece into a 7" x 12" (18 cm x 30 cm) rectangle on a lightly floured surface. Add flour as needed so that your dough does not stick to your surface. It is essential to keep the dough that you aren't working with in the refrigerator. The warmer the dough becomes, the more difficult it is to work with.
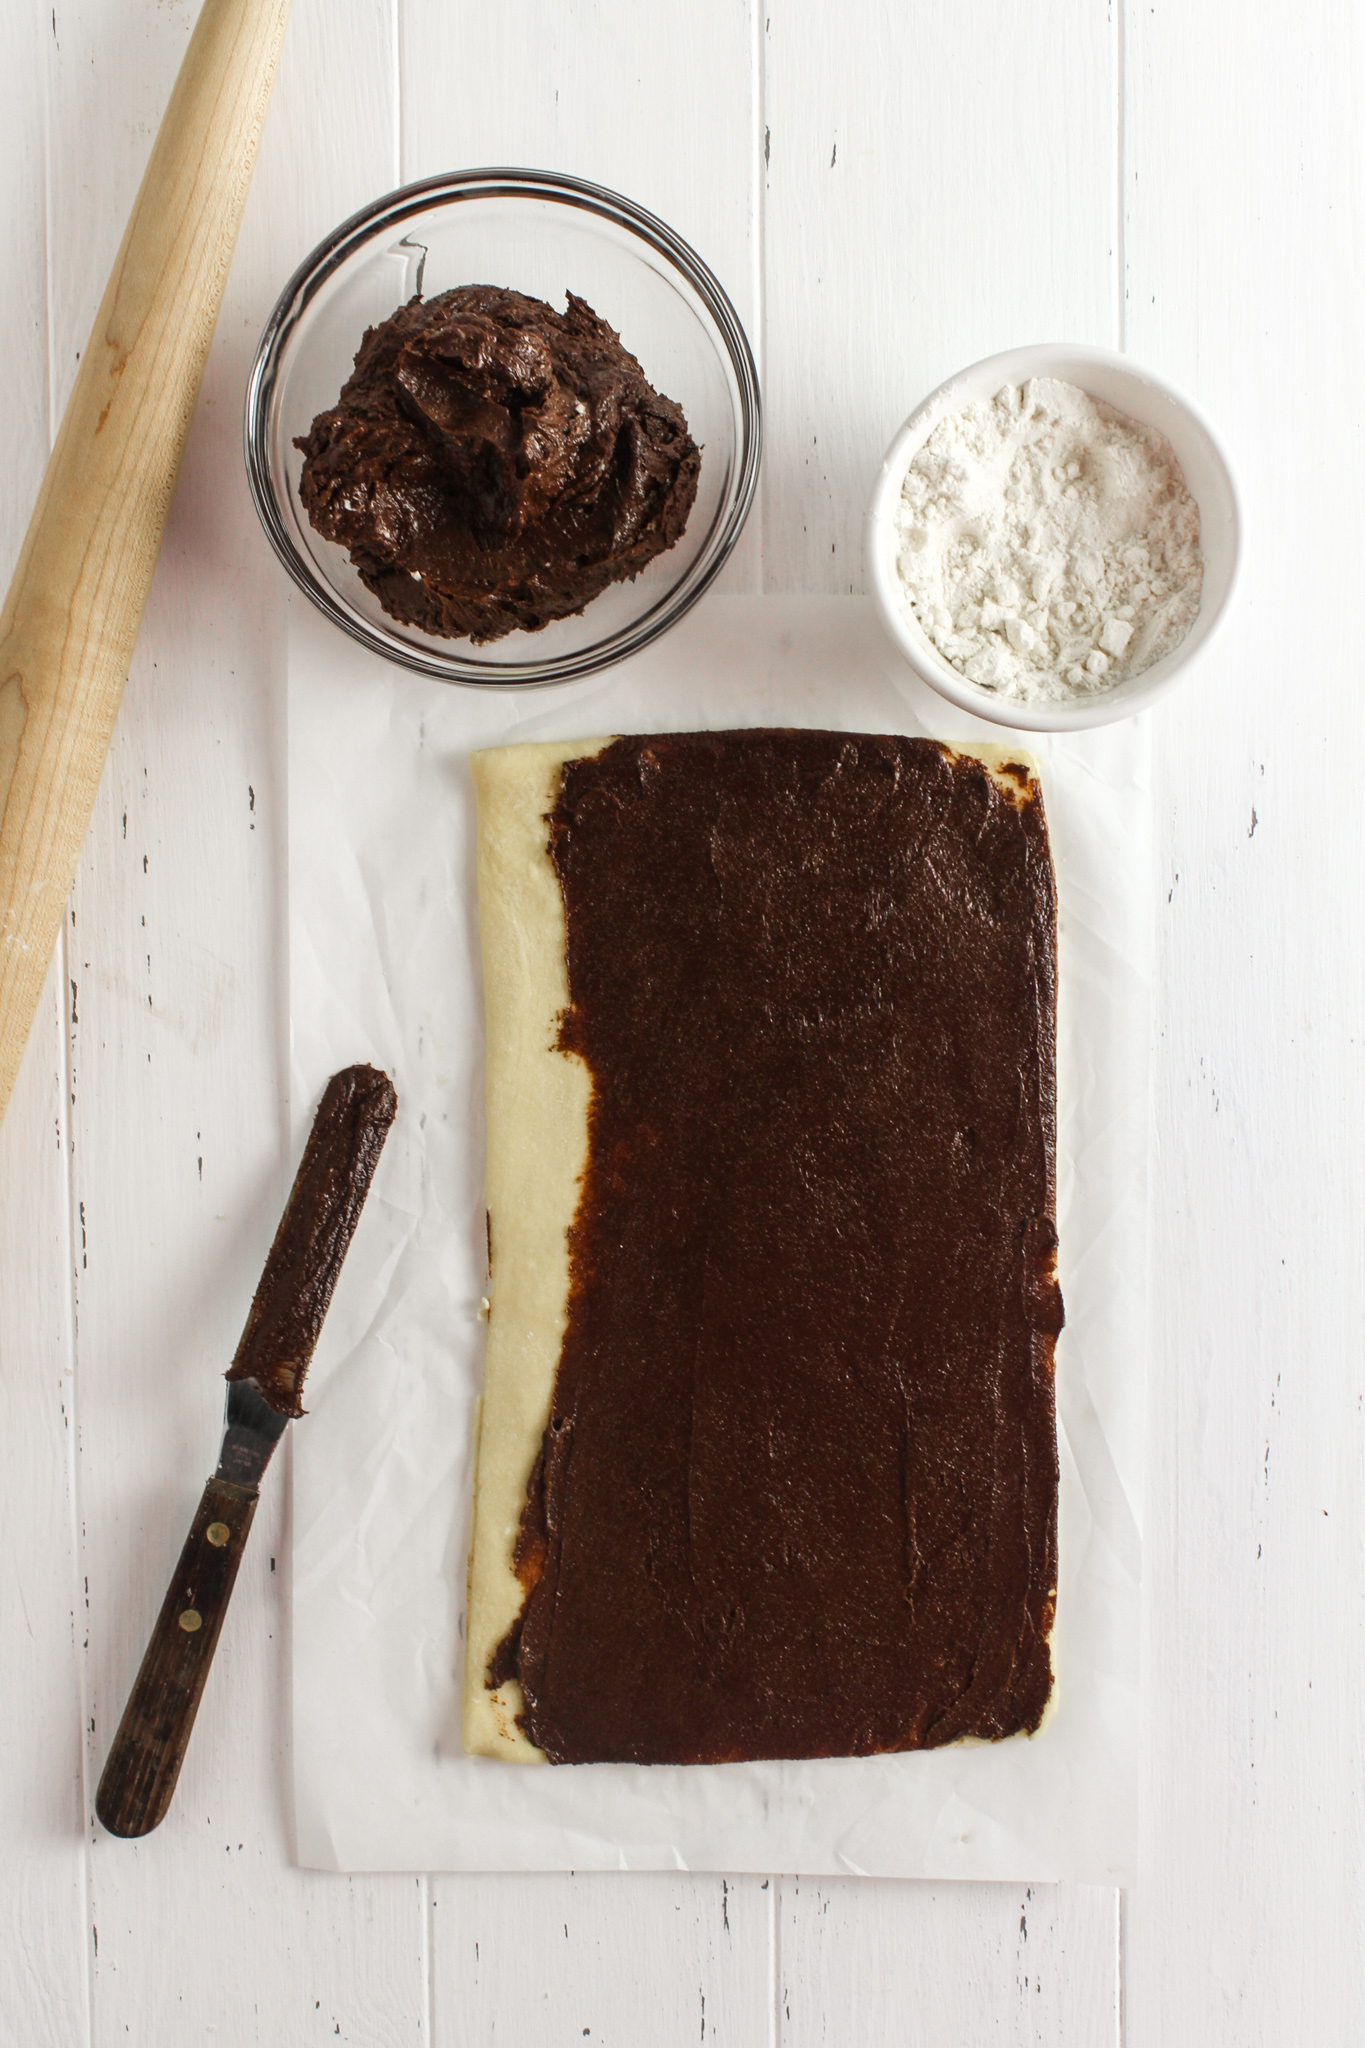
- Fill the dough. Using an offset spatula (a knife will work too), spread the filling across your rolled dough, leaving a ½" (1.25 cm) border along one of the long edges on each of the rectangles. Brush the bare edge with water and tightly roll the dough into a log and seal with the wet edge. Gently roll log until it is 15" (38 cm) long (careful not to squish all the filling). Cut in half, and place in freezer for about 5 minutes to making shaping easier.
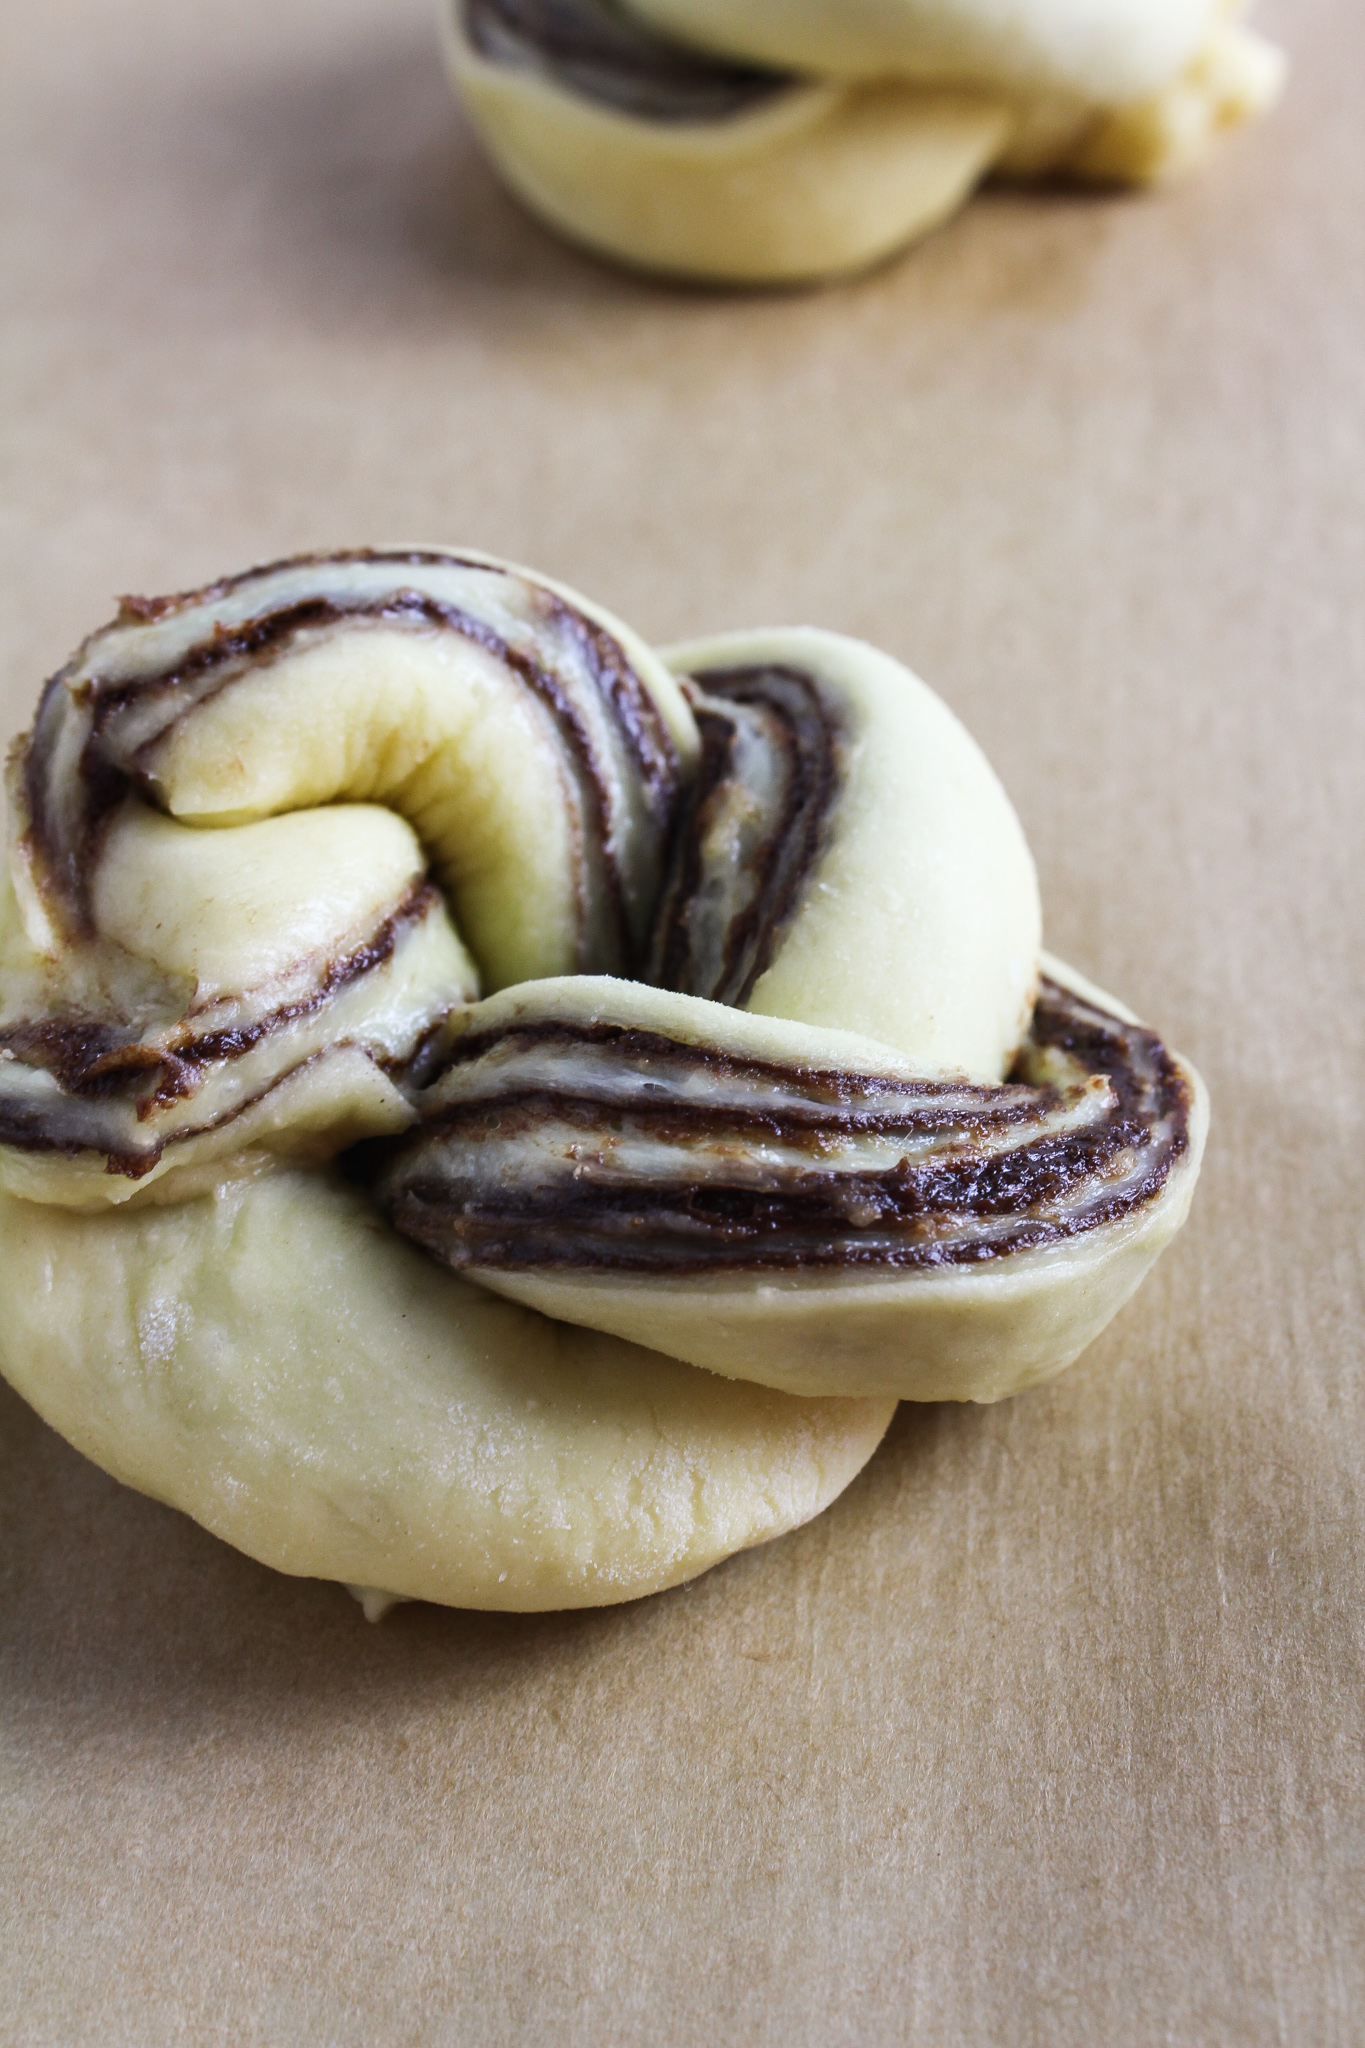
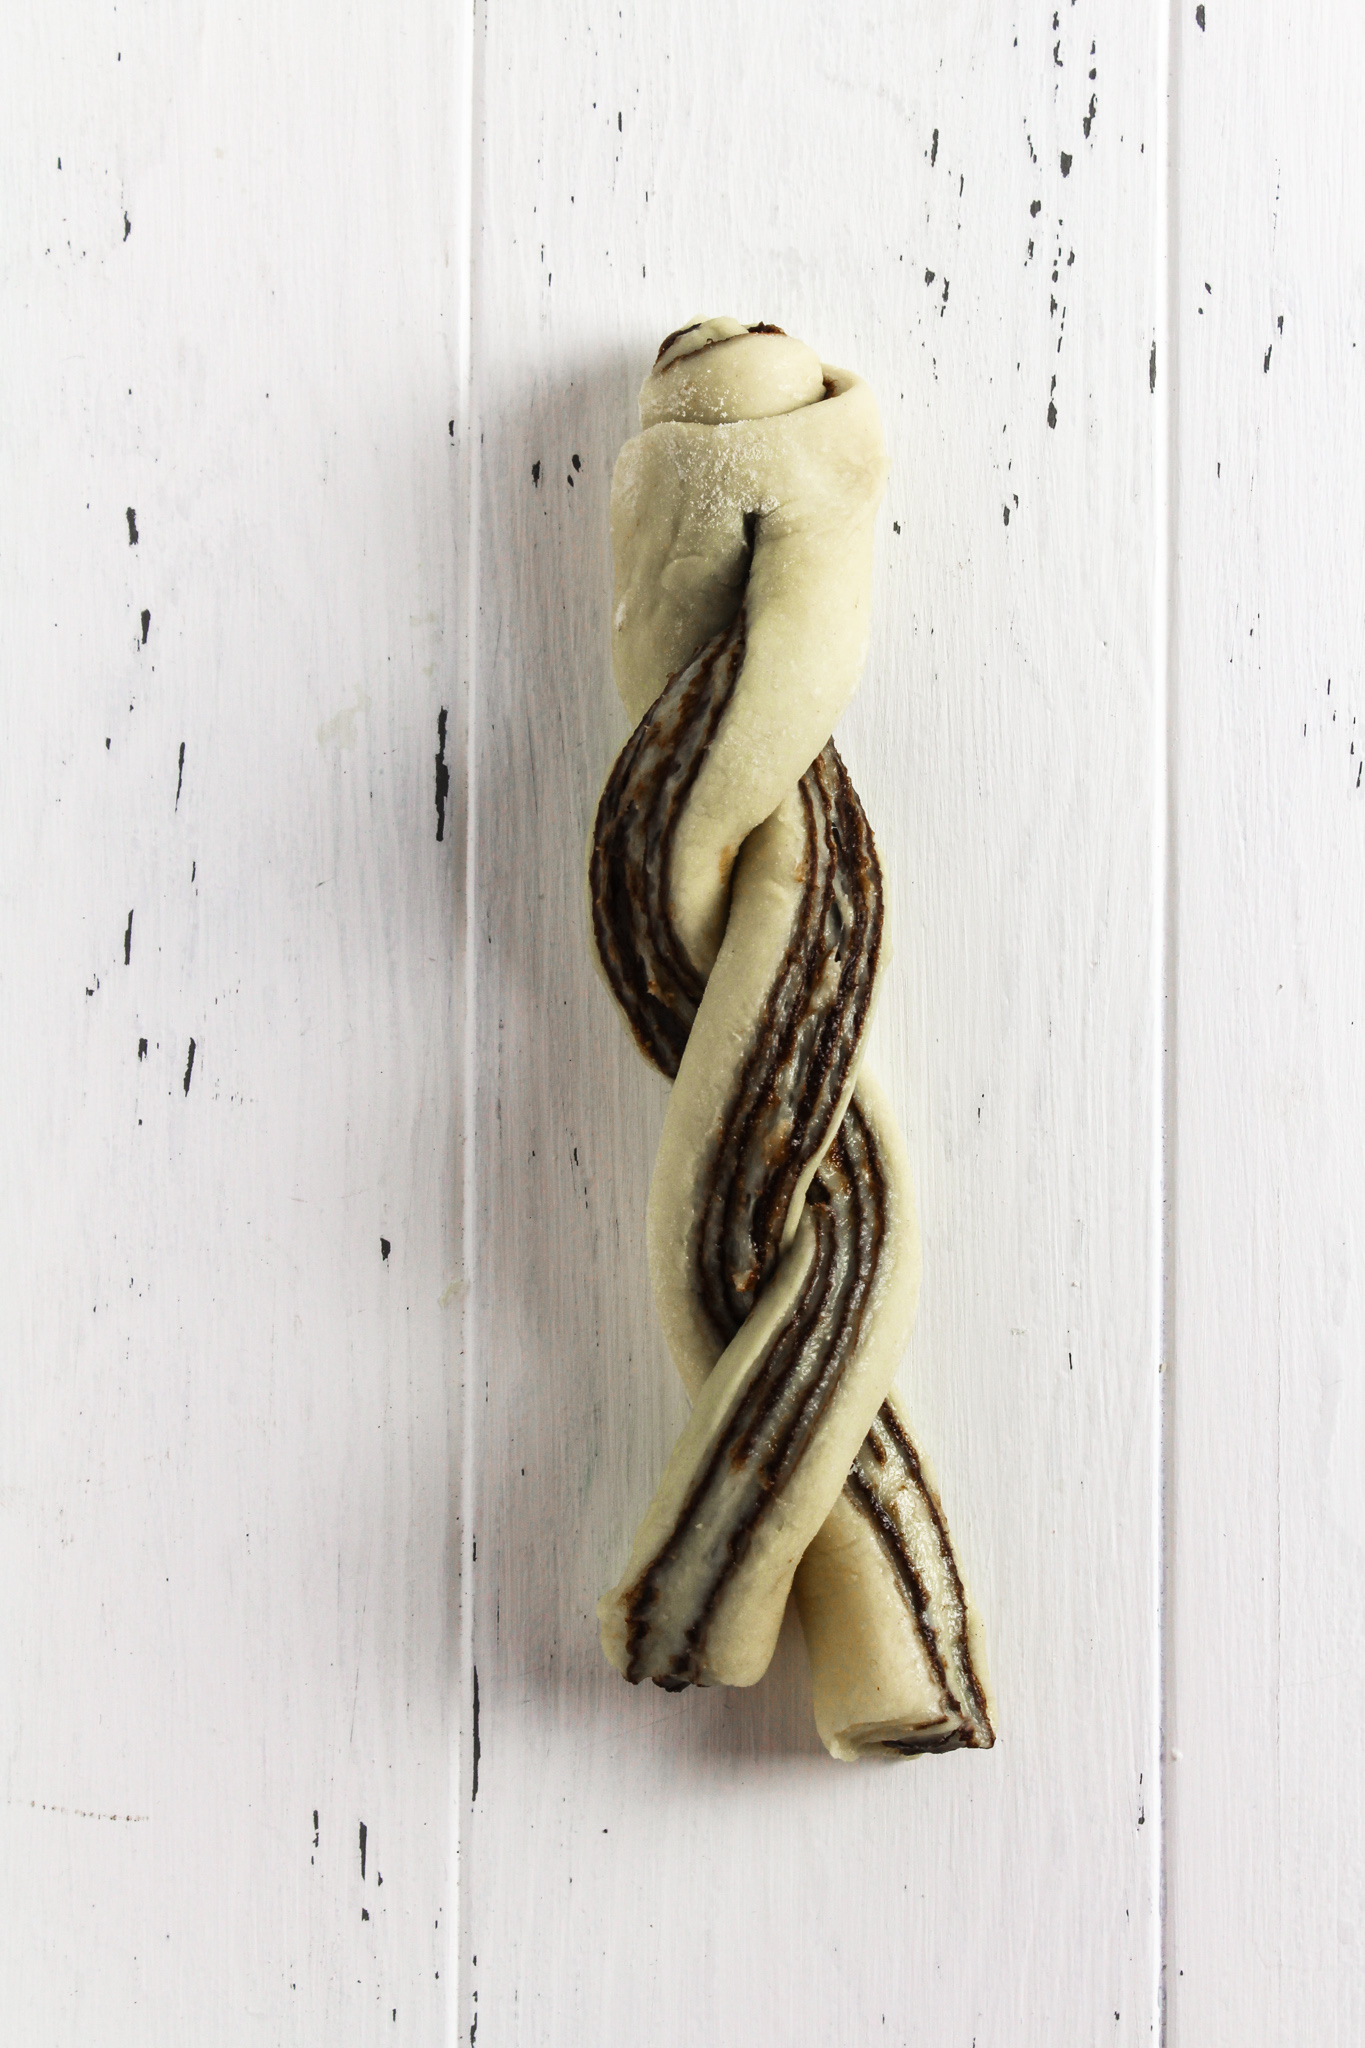
- Shape the dough. Using a serrated knife, slice brioche log in half lengthwise, allowing ¾" (2 cm) uncut. With the cut side facing up, place the right side of the dough over the left side and continue to repeat with all the dough to create a "braid." Brush a little water on the ends, twist the dough into a circle and pinch ends together. Place on a baking sheet lined with parchment paper, and repeat with each log.
- Final proof. Loosely cover chocolate brioche with a kitchen towel, and allow to proof at room temperature for 1 hour.
- Bake. Brush each chocolate brioche braid with egg wash, and bake in an oven preheated to 350°F/177°C for 20-25 minutes or until golden brown.
Tips and takeaways
- To make brioche dough, it is necessary to use a stand mixer fitted with a dough hook. Incorporating softened butter into the dough is quite difficult by hand. If done by hand, the butter would get too soft (even begin to melt because of warm hands), and it would be difficult to incorporate all of the butter into the dough because it would stick to your hands and work surface.
- Depending on the weather, the temperature of a home, etc., room temperature can vary kitchen to kitchen. If your oven has a built-in proofer, you can more consistently proof your dough. But have no worries, if you do not have a proofer, you can still proof your bread in your oven (my quick and easy tip). Typically I will turn my oven on for about a minute to add a bit of warmth and bring it to an ideal room temperature. I immediately turn it off and place my covered dough in the oven to proof. You do not want a hot oven, just a temperature that is closer to room temperature (about 75°F/24°C).
- Allowing the brioche dough to proof in the refrigerator overnight will yield the best tasting brioche. A cold overnight rise adds flavor and tenderness to the bread. Additionally, it allows the gluten to relax, which makes it easier to shape the dough.
- Be sure to place enough space between each chocolate brioche. Six brioche braids fit comfortably on a ¾ sheet pan (21" x 15"/53 cm x 38 cm). The final proof will cause each braid to puff up (as well as while it bakes).

Love brioche? Try these other recipes...
Make sure to tag me @thesweetoccasion on Instagram and leave me a review below if you make this Chocolate Brioche. I'd love to see your creations and read your feedback. And if you would like to make this recipe later, be sure to pin this recipe using the button on any of these images. Let's make every occasion a sweet occasion!
Print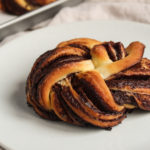
Chocolate Brioche
- Total Time: 12 hours 40 minutes
- Yield: 8 brioche buns 1x
Description
Chocolate brioche bread is an enriched yeasted bread that is layered with slightly sweetened chocolate filling. This delicious pastry can be served for breakfast or dessert.
Ingredients
For the brioche dough
- 2 ¾ cups (330 g) all-purpose flour
- 1 ½ teaspoons (4 g) instant yeast
- 3 tablespoons (29 g) granulated sugar
- 1 ¼ (7 g) teaspoons salt
- 4 large (200 g) eggs, lightly beaten at room temperature
- ¼ cup (57 g) whole milk, at room temperature
- 10 tablespoons (140 g) unsalted butter, at room temperature
- Egg wash
For the chocolate filling
- 4 oz (113 g) unsalted butter, at room temperature
- ¼ cup (50 g) granulated sugar
- ⅓ cup (40 g) cocoa powder
- 1 tablespoon (21 g) honey
- ¼ teaspoon (1.4 g) salt
Instructions
For the brioche
- In the bowl of a stand mixer fitted with the dough hook, mix flour, yeast, sugar and salt to evenly combine. Add the eggs and milk. Mix on medium speed for about 5 minutes. Using a spatula or dough scraper, scrape the dough from the sides and bottom of the bowl. If the dough feels sticky add about 1 tablespoon of flour. Continue mixing for another 5 minutes and repeat process 2 more times. Add enough flour so that dough is still slightly sticky to the touch. It is ok for some of the dough to still be sticking to the sides of the bowl.
- With the mixer on low, add half of the butter and mix until incorporated, about 3-4 minutes. Scrape down the sides and bottom of the bowl and add the remaining butter. Mix on medium speed for about 5 minutes or until butter is completely incorporated and the dough is elastic and shiny.
- In a medium bowl, lightly sprinkle some flour and add the dough. Cover the bowl with plastic wrap and allow the dough to rest at room temperature for about 1-2 hours or until dough doubles in size. On a lightly floured surface press out the gases of the dough. Stretch and fold the left side of the dough over to the center as well as the right side over to the center. Repeat process with the top and bottom portions of the dough. Place seam side down in a lightly floured bowl, cover, and refrigerate overnight to ferment.
For the chocolate filling
- In a medium bowl using a hand-held mixer or stand mixer fitted with the paddle attachment, beat softened butter until light and creamy, about 1 minute. Add the sugar and beat until light and fluffy, about 2 minutes. Mix in cocoa powder, honey and sugar until incorporated.
To assemble
- Remove dough from the refrigerator and divide into four equal pieces. Work with one piece a dough at a time while keeping the rest in the refrigerator.
- On a lightly floured surface, roll out the first piece of dough to a 7" x 12" (18 cm x 30 cm) rectangle. Using an offset spatula, spread a quarter of the filling onto the rectangle allowing for a ½" (1.25 cm) border along one of the long edges. Brush the bare edge with with water. Beginning with the opposite end, roll the dough tightly into a log. Once rolled, gently roll the log until it is 15" (38 cm) long (careful not to squish the dough). Cut the log in half to create two equal logs. Repeat process with remaining three pieces of dough. Transfer all logs to a baking sheet and place in freezer for 5 minutes.
- Remove from freezer. Using a serrated knife, cut the dough log in half, lengthwise leaving ¾" (2 cm) at the top uncut. With the cut side facing up, place right side of the dough over the left side and continue to repeat with all the dough to create a "braid."
- Brush a bit of water on the ends, shape the braided dough into a circle and pinch the ends together. Repeat with remaining dough. Place each braided dough on a parchment or silicone lined sheet pan and cover loosely with a kitchen towel. Allow to proof at room temperature for 1 hour.
- Preheat oven to 350°F/177°C.
- Once the dough has proofed, brush each brioche braid with egg wash and bake until golden brown, 20-25 minutes.
- Prep Time: 1 hour 15 minutes
- Cook Time: 25 minutes
- Category: Bread
Liane Chow says
I had bookmarked your recipe for a while when your picture of these pastries caught my eye. I finally found the time to make them since it was a lengthy process, but totally worth it. They came out perfect and I loved that they weren't too sweet with the chocolate filling. Family and friends gave this recipe a thumbs up for taste, texture and overall look. This is a keeper of a recipe for me! Thanks!
Maria Pagiotas says
Hi Liane!! Thank you so much for sharing!! I'm so happy everyone enjoyed this recipe and that you made it!!
Ànjelica says
My family and I love these. I make the chocolate babka bread which is good but I wasn't able to get the dough excalty how I like it then I tried your dough recipe and it was perfect so o kind mash the 2 recipes together whe it comes to the filling and I put smother them with simple syrup on them when they come out to keep the shine and them moist . Needless to say they were gone in 24 hrs! I love your recipe. Thank you for sharing .!
Maria Pagiotas says
Hello Anjelica! I'm so happy you and your family love this recipe! Great idea with the simple syrup, I will have to give that a try next time I make these. Thank you for sharing your feedback!! Happy Baking!
Pegstur says
These are delicious. Subtle chocolate sweetness. You could probably put I glaze on them if you want it sweeter.
Maria Pagiotas says
So happy you enjoyed these! Thank you for sharing! A glaze would be a lovely addition 🙂
Erica says
I don’t have a kitchen aide . Can I just kneed with hands ?
Maria Pagiotas says
Hi Erica! It's a bit more messy but you can mix by hand! I would suggest using dough scrapes to have blend the butter into the dough (less butter on your hands!). Just make sure not to cut into the dough (just use them to knead the butter into the dough). Before adding the butter you'll want to make sure you knead the dough for at least 10-15 minutes. Happy Baking!
Emily says
Mine are in the oven as I write this. It was a very long process but they look (and smell) wonderful. Question: mine expanded and are HUGE. My final proof was much longer than needed, could that be why? Wish I could attach photo!
Maria Pagiotas says
Hi Emily! Yes, if they are very big they most likely over proofed. Depending on your kitchen temperature, the proofing could need more or less time. But even so they should be delicious 🙂
Melinda says
Thank you Maria for this lesson in brioche baking. It's probably the most delicious and beautiful thing I've ever made. Your recipe and instructions are perfect.
Now I have to go for a run because these are irresistible.
Maria says
Hello Melinda! I'm so happy to hear that you've enjoyed this recipe! Thank you so for making and for your feedback! Happy Baking!