
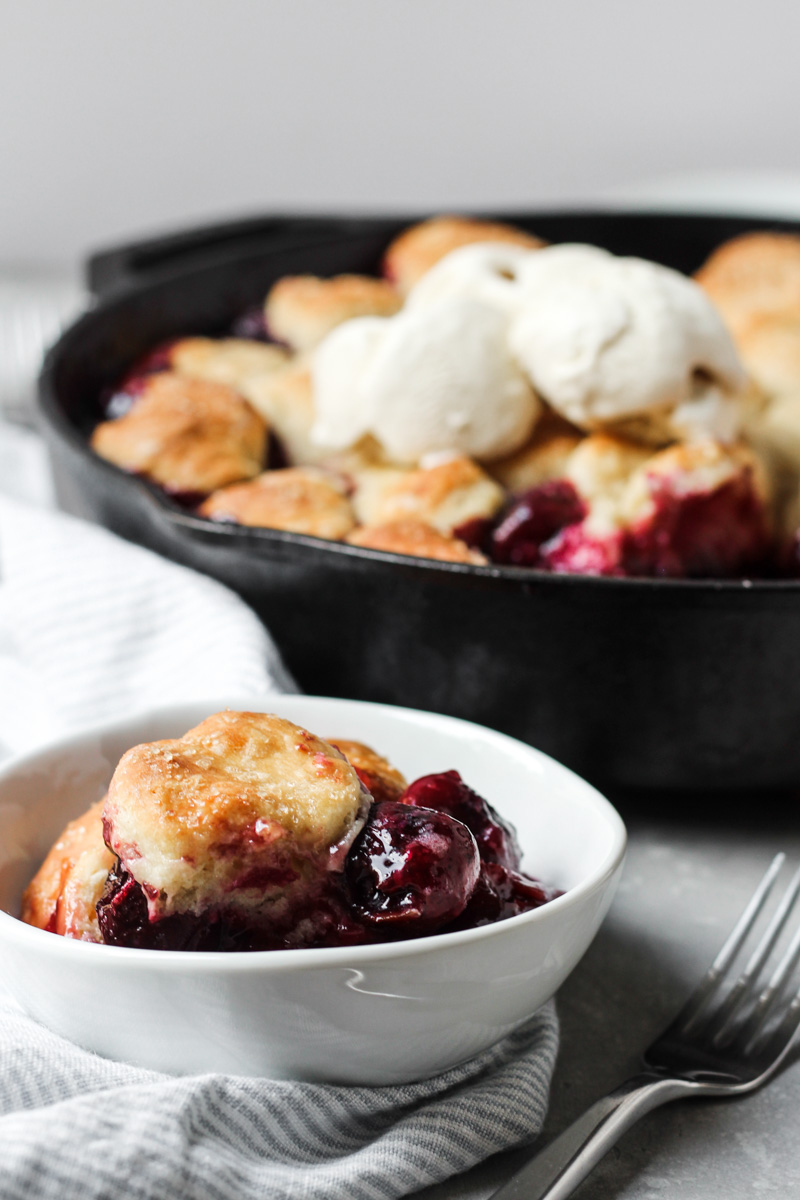
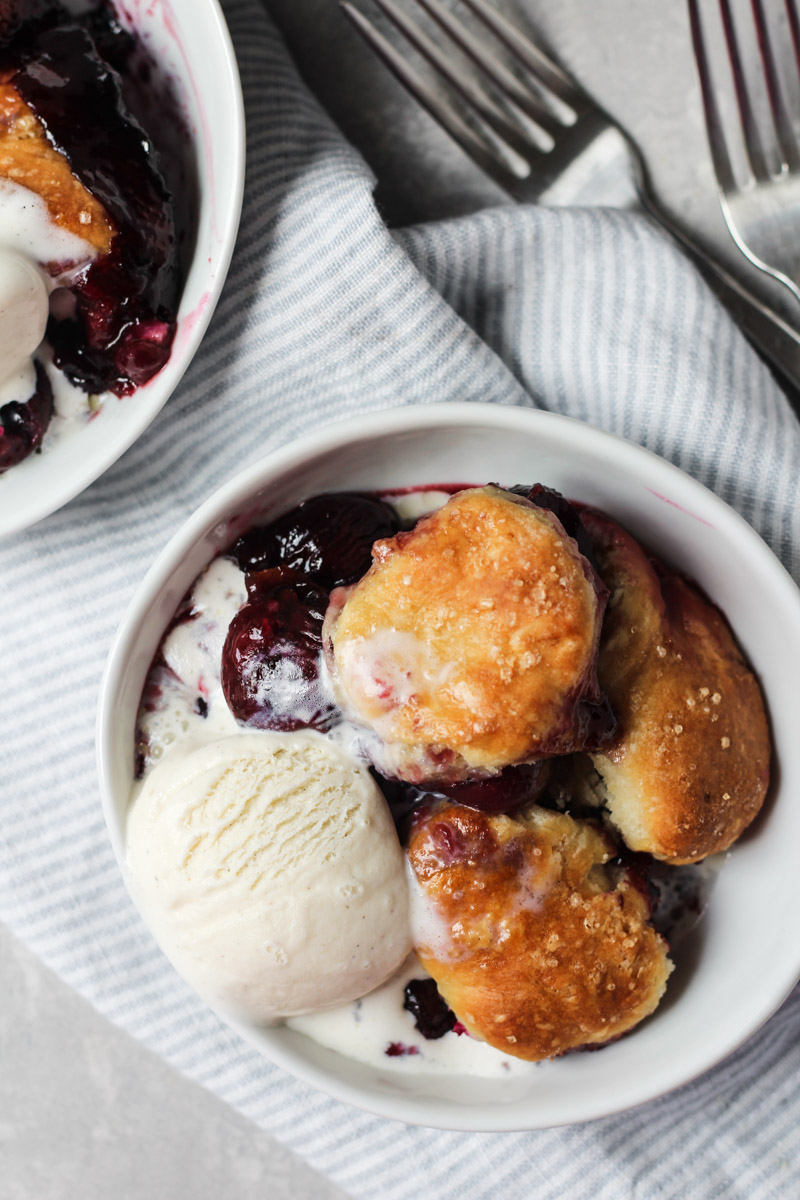
Cherry Cobbler is a seasonal dessert made with fresh cherries and topped with flaky biscuits that can be served all summer long. It's delicious served warmed with a scoop of vanilla ice cream.
Save This Recipe! 💌
It's cherry season, and you're wondering what you can make with all your fresh cherries. Sure they are perfect for snacking on, but cherries also make some of the most delicious summer desserts. Cherry cobbler is the perfect dessert to showcase your fresh cherries. A flavorful yet simple filling is topped with flaky homemade biscuits for a tasty treat!
Why this recipe works
- Uses fresh seasonal cherries for a delightful flavor
- Easy flaky biscuits are the perfect complement to the filling.
- A fun recipe for using your cast iron skillet.
- The biscuit topping can be prepped a day in advance.
- It pairs well with vanilla ice cream.
Before you begin
Take out the following baking equipment.
Digital kitchen scale
12-inch cast iron skillet
Medium mixing bowl
Whisk
Pastry cutter, optional
Wooden spoon
Bench scraper or knife
Rolling pin
2-inch (5 cm) round cutter
Large mixing bowl
Silicone spatula
Read the recipe through from start to finish.
Understanding ingredients
Butter is used to create flaky layers in the biscuit topping. It's essential to use cold diced butter for this recipe. Dice your butter and then store it in the refrigerator to keep it cold until ready to use.
Fresh cherries are the star of the recipe. I prefer to keep the cherries whole. However, if your cherries are huge, you can slice them in half.
Biscuits can be made with buttermilk or heavy cream, the option is yours. I use heavy cream for this recipe because the full fat gives the biscuit topping a light and tender texture with a deliciously rich flavor.
Types of cherries to use
You can use a variety of cherries, each having a distinct flavor profile.
Bing cherries are very sweet. They have a distinct heart shape and are available in most supermarkets.
Rainier cherries have a mild, sweet flavor with a hint of tartness. They are distinguished by their yellow and red, two-toned color. Typically, they become available in June and last until August.
Montmorency cherries are grown in Michigan and have a very tart flavor that is great for baking.
Morello cherries are also tart and used in baking, but because of their sourness, they are not ideal for snacking.
How to select cherries
Selecting the best cherries will yield the best flavor in this biscuit cobbler. Use these tips when picking your cherries:
- Color. Depending on the variety, cherry colors fluctuate. It's best to select cherries that are glossy, dark red (unless using Rainier cherries), and have green stems. These characteristics will ensure the freshest quality.
- Size. Firm, plum cherries are the best tasting.
- Storing. Store your cherries in the refrigerator to preserve their taste and freshness. They will last 5-7 days, but it's best to consume within a couple of days.
- Wash. Wash your fruit just before eating or using to bake. Doing this will extend the shelf life.
Butter vs. shortening for biscuits
I always prefer using butter for biscuits because of the delicious buttery flavor, but you can use shortening instead. Here is a look at the differences between the two:
Butter. When using the proper mixing technique, the butter will create distinct flaky layers in a biscuit. When the pieces of butter melt in the oven, steam is released, creating pockets of air, and thus, the flaky layers. The milk solids in butter (which contain sugar), give biscuits a nice browned exterior. Butter also adds a distinct, delicious flavor to biscuits.
Shortening. Biscuits made with shortening have a softer, crumbly texture. They tend to be flatter as they do not get the extra rise from the buttery steam. Compared to butter, shortening has a high melting point and is less likely to melt into your dough. Because of the lack of milk solids, shortening biscuits are much paler and need to be brushed with melted butter or milk to get nicely browned.
How to make the biscuit topping
To create a flakey, tall topping, it's important to properly mix your biscuits.
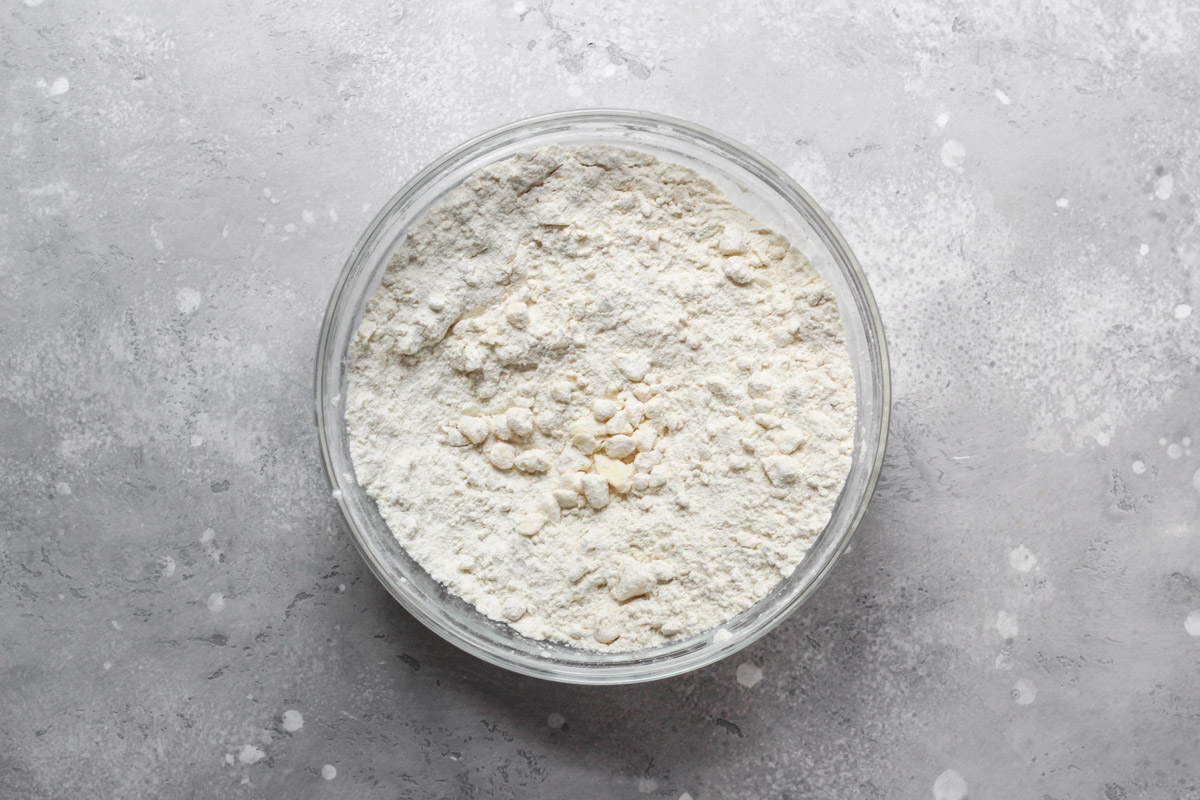
Dry ingredients. Begin with whisking together the flour, sugar, baking powder, and salt.
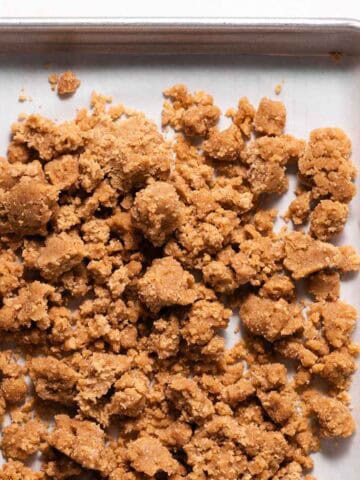
Cut in butter. Cut the butter into the dry ingredients using a pastry cutter or by hand, rubbing the pieces of butter between your thumb, index, and middle fingers. It's essential to use cold cubed butter, preferably straight from the refrigerator. Work the dough until your butter is pea-sized. Do not overwork the butter or allow it to get too warm.
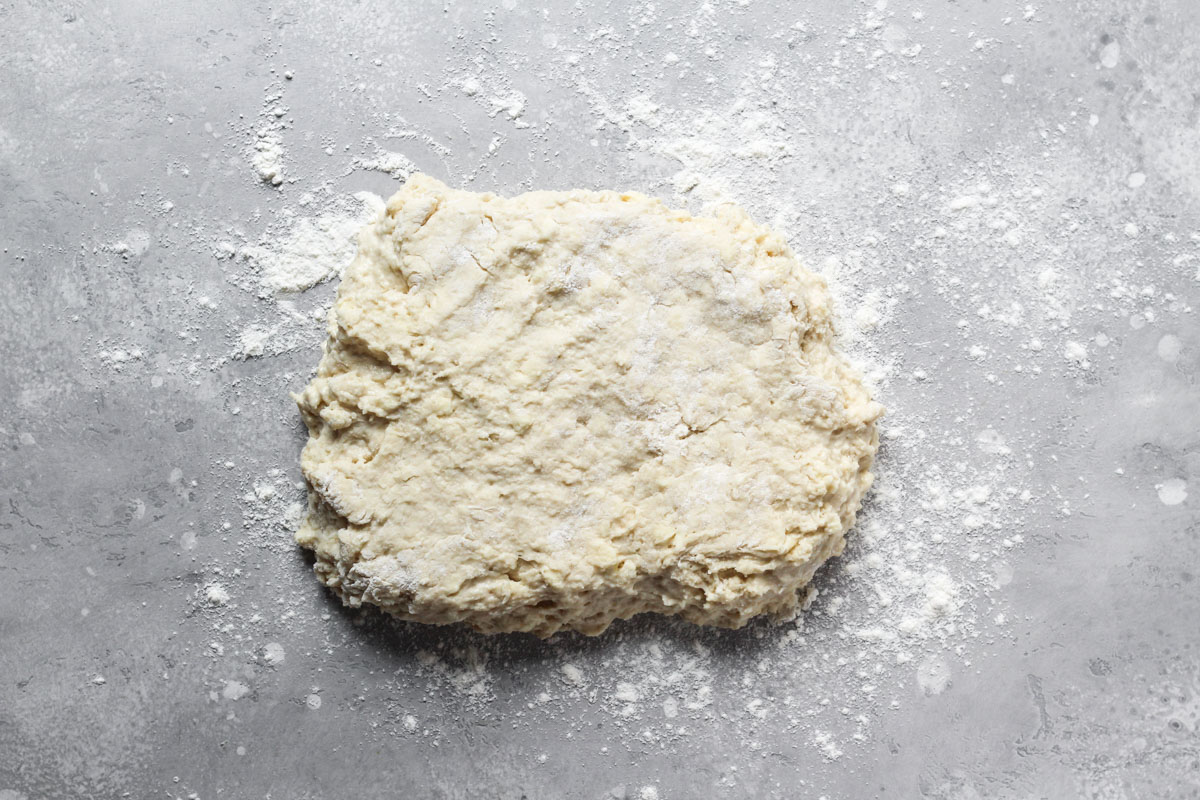
Add the cream. Slowly pour the cream into the flour mixture while constantly tossing with a wooden spoon to evenly distribute. Once all the cream is added, fold the dough over onto itself until it comes together into one big mass. The dough will still feel wet and sticky (this is normal!).
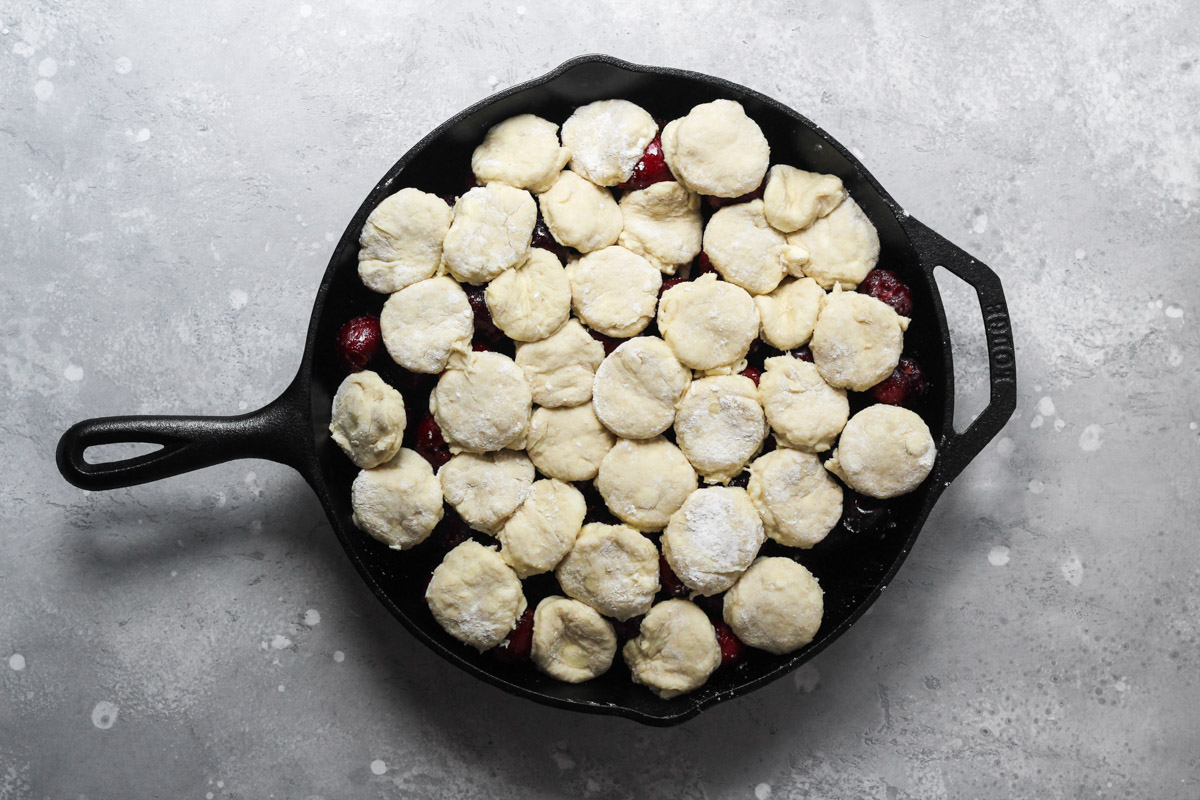
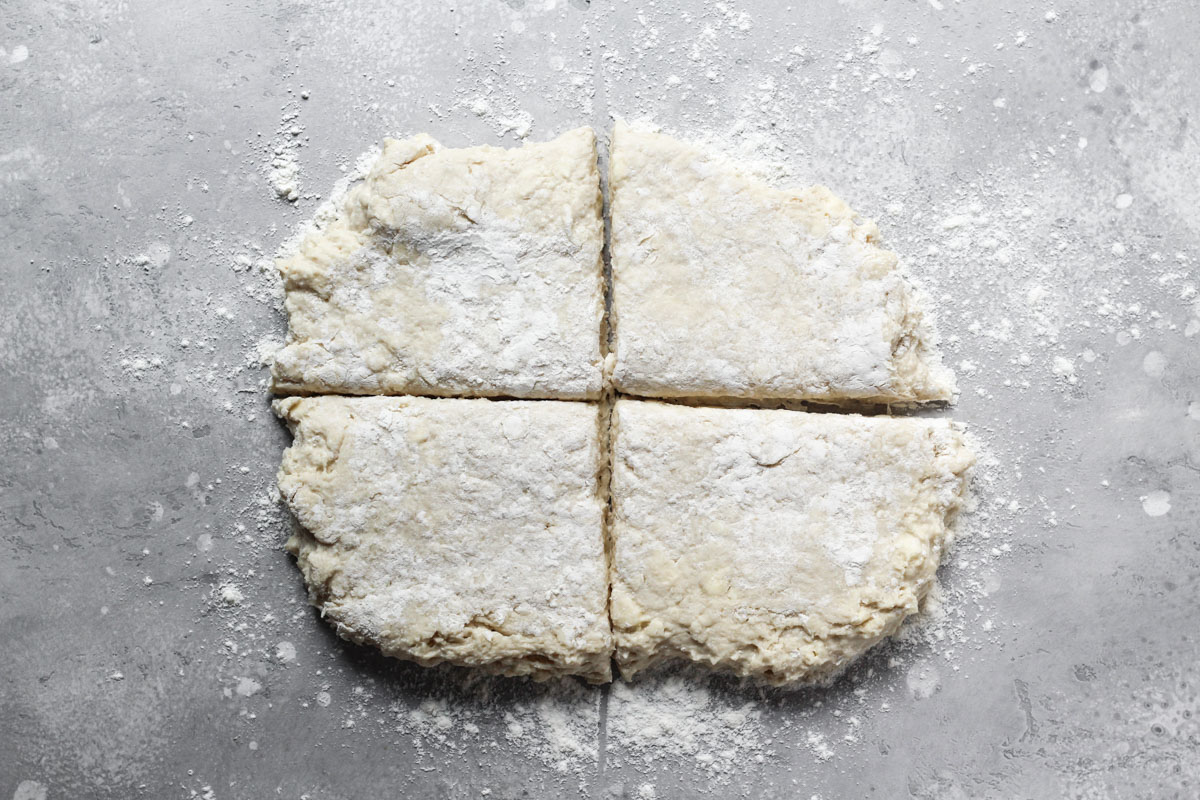
Cut the dough. On a generously floured surface, turn out the dough and shape into a ¾-inch (2 cm) thick rectangle. Make sure to also add some flour to your hands so that the dough doesn't stick (add any additional flour to the dough to prevent it from sticking). Cut the dough in half vertically and then again horizontally to form 4 equal pieces. Stack the pieces on top of each other and roll to a ½-inch (1.25 cm) thickness.
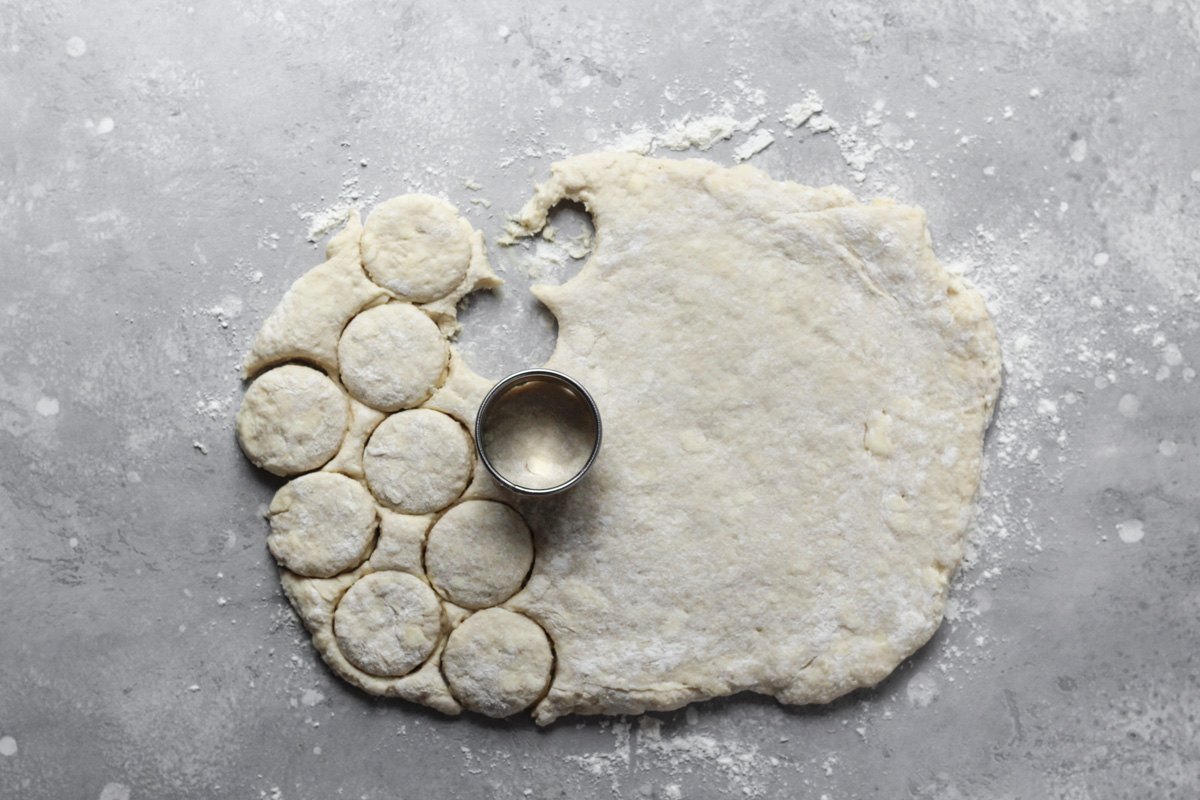
Cut the biscuits. Dip a 2-inch (5 cm) round cutter into flour and cut round biscuits. Try and keep your cuts as close as possible to minimize scraps. Reroll any scraps and cut out additional biscuits until you have about 35 biscuits. Chill the cut dough until ready to use.
Substitutions
This cobbler is perfect as it, but if you'd like to play around with flavors and try other variations, here are some ideas.
- For extra lemon flavor, add the zest of one lemon to the filling.
- Replace half of the fresh cherries with 680 g (1.5 pounds) of sliced fresh peaches and add 6 g (1 tablespoon) ground cinnamon.
- Omit the almond extract, replace with 2 g (½ teaspoon) pure vanilla extract, and add 6 g (1 tablespoon) ground cinnamon.
Tips and takeaways
- If the butter begins to get warm while mixing the topping, place your mixing bowl into the refrigerator until it chills down again. It is essential to keep your butter cold to achieve flakey layers.
- Cutting and stacking your dough contributes to creating flaky layers in your biscuits.
- You can make the biscuit topping up to 1 day in advance. Wrap tightly with plastic wrap and keep refrigerated until ready to use.
- I don't recommend freezing cherry cobbler as the cherries will become mushy and the biscuits soggy when they are thawed.
- Top with homemade vanilla ice cream for a delicious treat.
Love cherries? Try these other recipes too...
Make sure to tag me @thesweetoccasion on Instagram and leave me a review below if you make this Cherry Cobbler. I'd love to see your creations and read your feedback. And if you would like to make this recipe later, be sure to pin this recipe using the button on any of these images. Let's make every occasion a sweet occasion!
Print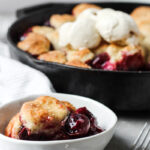
Cherry Cobbler
- Total Time: 1 hour 5 minutes
- Yield: 10-12 servings 1x
Description
Cherry cobbler is a seasonal dessert made with fresh cherries and topped with flaky biscuits that can be served all summer long. It's delicious served warmed with a scoop of vanilla ice cream.
Ingredients
For the biscuit topping
- 385 g (2 ¾ cups) all-purpose flour
- 55 g (¼ cup) granulated sugar
- 10 g (1 tablespoon) baking powder
- 2.8 g (½ teaspoon) salt
- 141 g (10 tablespoons) cold unsalted butter, diced
- 300 g (1 ¼ cups) cold heavy cream
For the filling
- 1360 g (3 pounds) fresh cherries, pitted
- 147 g (⅔ cup) granulated sugar
- 28 g (2 tablespoons) fresh lemon juice
- 27 g (¼ cup) cornstarch
- 4 g (1 teaspoon) pure vanilla extract
- 1 g (¼ teaspoon) pure almond extract
- 1.4 g (¼ teaspoon) salt
- 28 g (2 tablespoons) unsalted butter, melted
- Turbinado sugar, for sprinkling
Instructions
- Preheat oven to 400°F/204°C.
For the biscuit topping
- In a medium bowl, whisk together the flour, sugar, baking powder, and salt.
- Cut the cold cubed butter into the dry ingredients using a pastry cutter or by hand, rubbing the pieces of butter between your thumb, index, and middle fingers. Work the dough until your butter is pea-sized. Do not overwork the butter or allow it to get too warm.
- Gradually add the cream into the bowl, tossing flour mixture constantly with a wooden spoon to evenly distribute. Fold the dough over onto itself until it comes together into a mass. At this stage, the dough will still feel wet and sticky.
- On a generously floured surface, turn out the dough and shape into a ¾-inch (2 cm) thick rectangle. Continue to add flour to prevent from sticking. Cut the dough in half vertically and then again horizontally to form 4 equal pieces. Stack the pieces on top of each other. Using a rolling pin, roll the dough to a ½-inch (1.25 cm) thickness.
- Dip a 2-inch (5 cm) round cutter into flour and cut round biscuits, keep your cuts as close as possible. Reroll scraps and cut additional biscuits. You should have about 35 biscuits. Chill until ready to use.
For the cherry filling
- In a large mixing bowl, combine the cherries, sugar, lemon juice, cornstarch, vanilla extract, almond extract, and salt until evenly mixed. Pour the filling into a 12-inch cast iron skillet.
- Arrange the chilled biscuits over the filling so that they are snuggly touching with minimal gaps. Brush with melted butter and sprinkle with turbinado sugar.
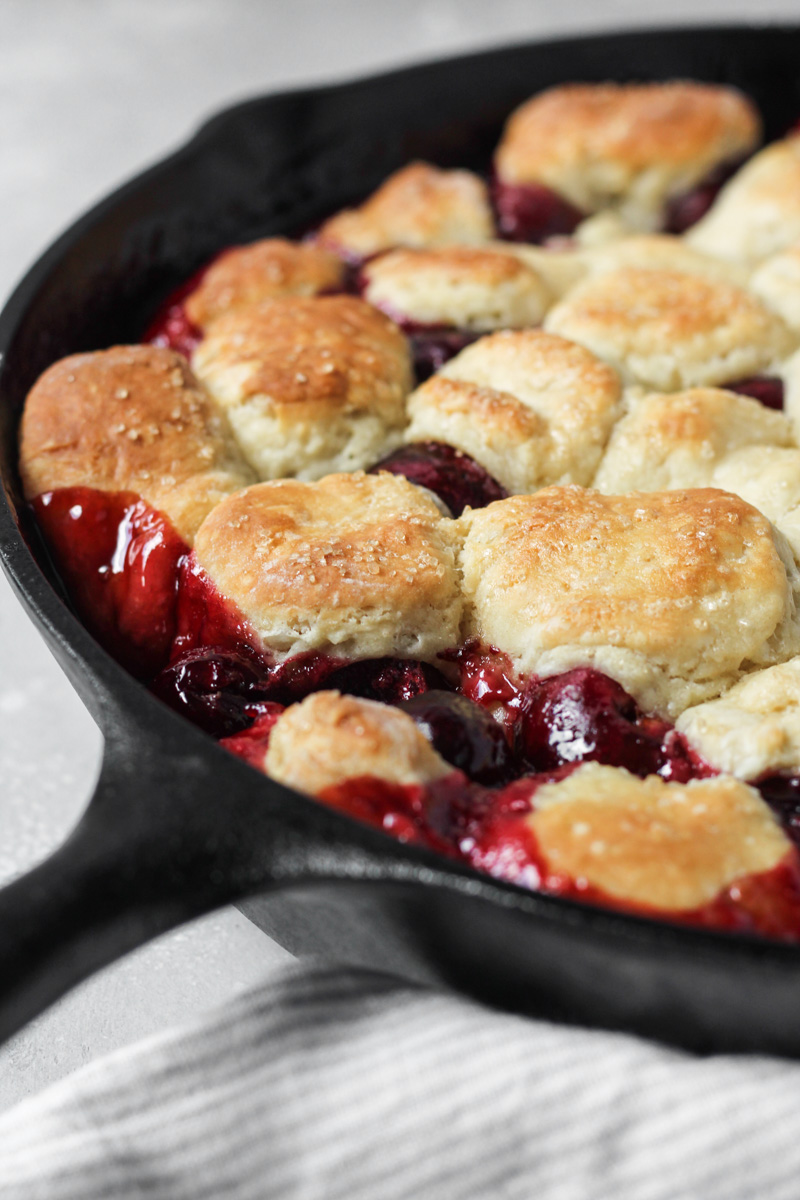
- Place the cobbler in the preheated oven and bake for 10 minutes. Reduce the oven temperature to 375°F/190°C for 30-35 minutes or until biscuits golden brown, and the filling is bubbly.
Notes
- Make-ahead: The biscuit dough can be made ahead up to 1 day. Wrap tightly with plastic wrap and keep refrigerated.
- Storage: Store the baked cobbler covered tightly and away from direct sunlight at room temperature for up to 3 days.
- Prep Time: 20 minutes
- Cook Time: 45 minutes
- Category: Pies

Leave a Reply